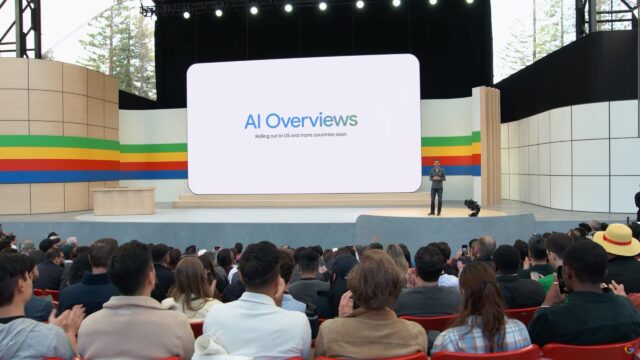
As a major AI advocate and enthusiast, I was one of the first people to sign up for Google’s Search Generative Experience, also known as Google AI Overviews. Back when I first tried the feature, it was available only to those who signed up for Search Labs, and it was completely optional. Out of curiosity, especially as someone who writes for a living and follows AI developments closely, I decided to explore it to see how it might continue to disrupt my industry.
For the first few weeks, I found myself frequently reviewing the AI results, though I always took an extra step to delve deeper into the actual sources or search results further down the page. That’s how I realized that, like with most things related to AI, the results varied dramatically in terms of accuracy. For basic inquiries like “When did World War II start?” I found it worked pretty well. However, when delving into specific battles or dates, things would quickly unravel.
As time progressed, I found myself automatically scrolling past the AI responses for 90% of inquiries. Part of this was because I couldn’t trust the information. The other reason was that this wasn’t how I wanted to use AI in the first place!
I want to be in control of when and where I use AI, not the other way around!
When I have a question that’s philosophical, theoretical, open-ended, or whimsical, or if I want to work out an idea in my head or ask a very direct question, I am more likely to turn to ChatGPT or Gemini. If it’s critically important or a broader topic that would benefit from trustworthy sources and a human perspective, that’s when I use Google Search.
For example, I wouldn’t trust Gemini’s AI to handle a search query about the best phones under $500. The AI results for buying advice around phones often mix old and new devices, feature misquoted specs, and other issues. But I would be much more likely to trust it with a simple question like clarifying a rule in Monopoly, where the stakes of an inaccurate answer are much lower.
Typically, I use AI for lower-stakes responses, the kind that won’t result in serious injury or significant errors if followed. That’s why I ultimately disabled the feature from Search Labs. Admittedly, it took me a long time to do this, only turning it off a few months ago because it became easy to ignore. Now it’s back, and this time there’s no way to opt-out. I had hoped that the experience might have improved in time for its more public-facing launch, but sadly that doesn’t seem to be the case. There has been some genuinely horrible advice found through Google AI Overviews, including a recent response suggesting someone drink urine to stay hydrated or the baffling advice about fixing blinkers, which included checking the blinker fluid.
This led me to look up ways to turn off AI overviews, though I was surprised to learn this process isn’t exactly straightforward. Typically, there’s no way to truly turn off the feature, but there are some workarounds that accomplish the same thing. If you have yet to turn off Google AI Overviews on your desktop, I highly recommend doing so. Google Overviews may someday be worth revisiting (a topic for another debate), but right now, you should do yourself a favor and stick to more trustworthy sources for your search results.
How to turn off Google AI overviews on desktop

While there are other methods like special plug-ins, these are all vulnerable to Google changes and could easily be broken. Probably the simplest and best solution is to change your browser settings. For those with Chrome, you simply need to follow the following instructions:
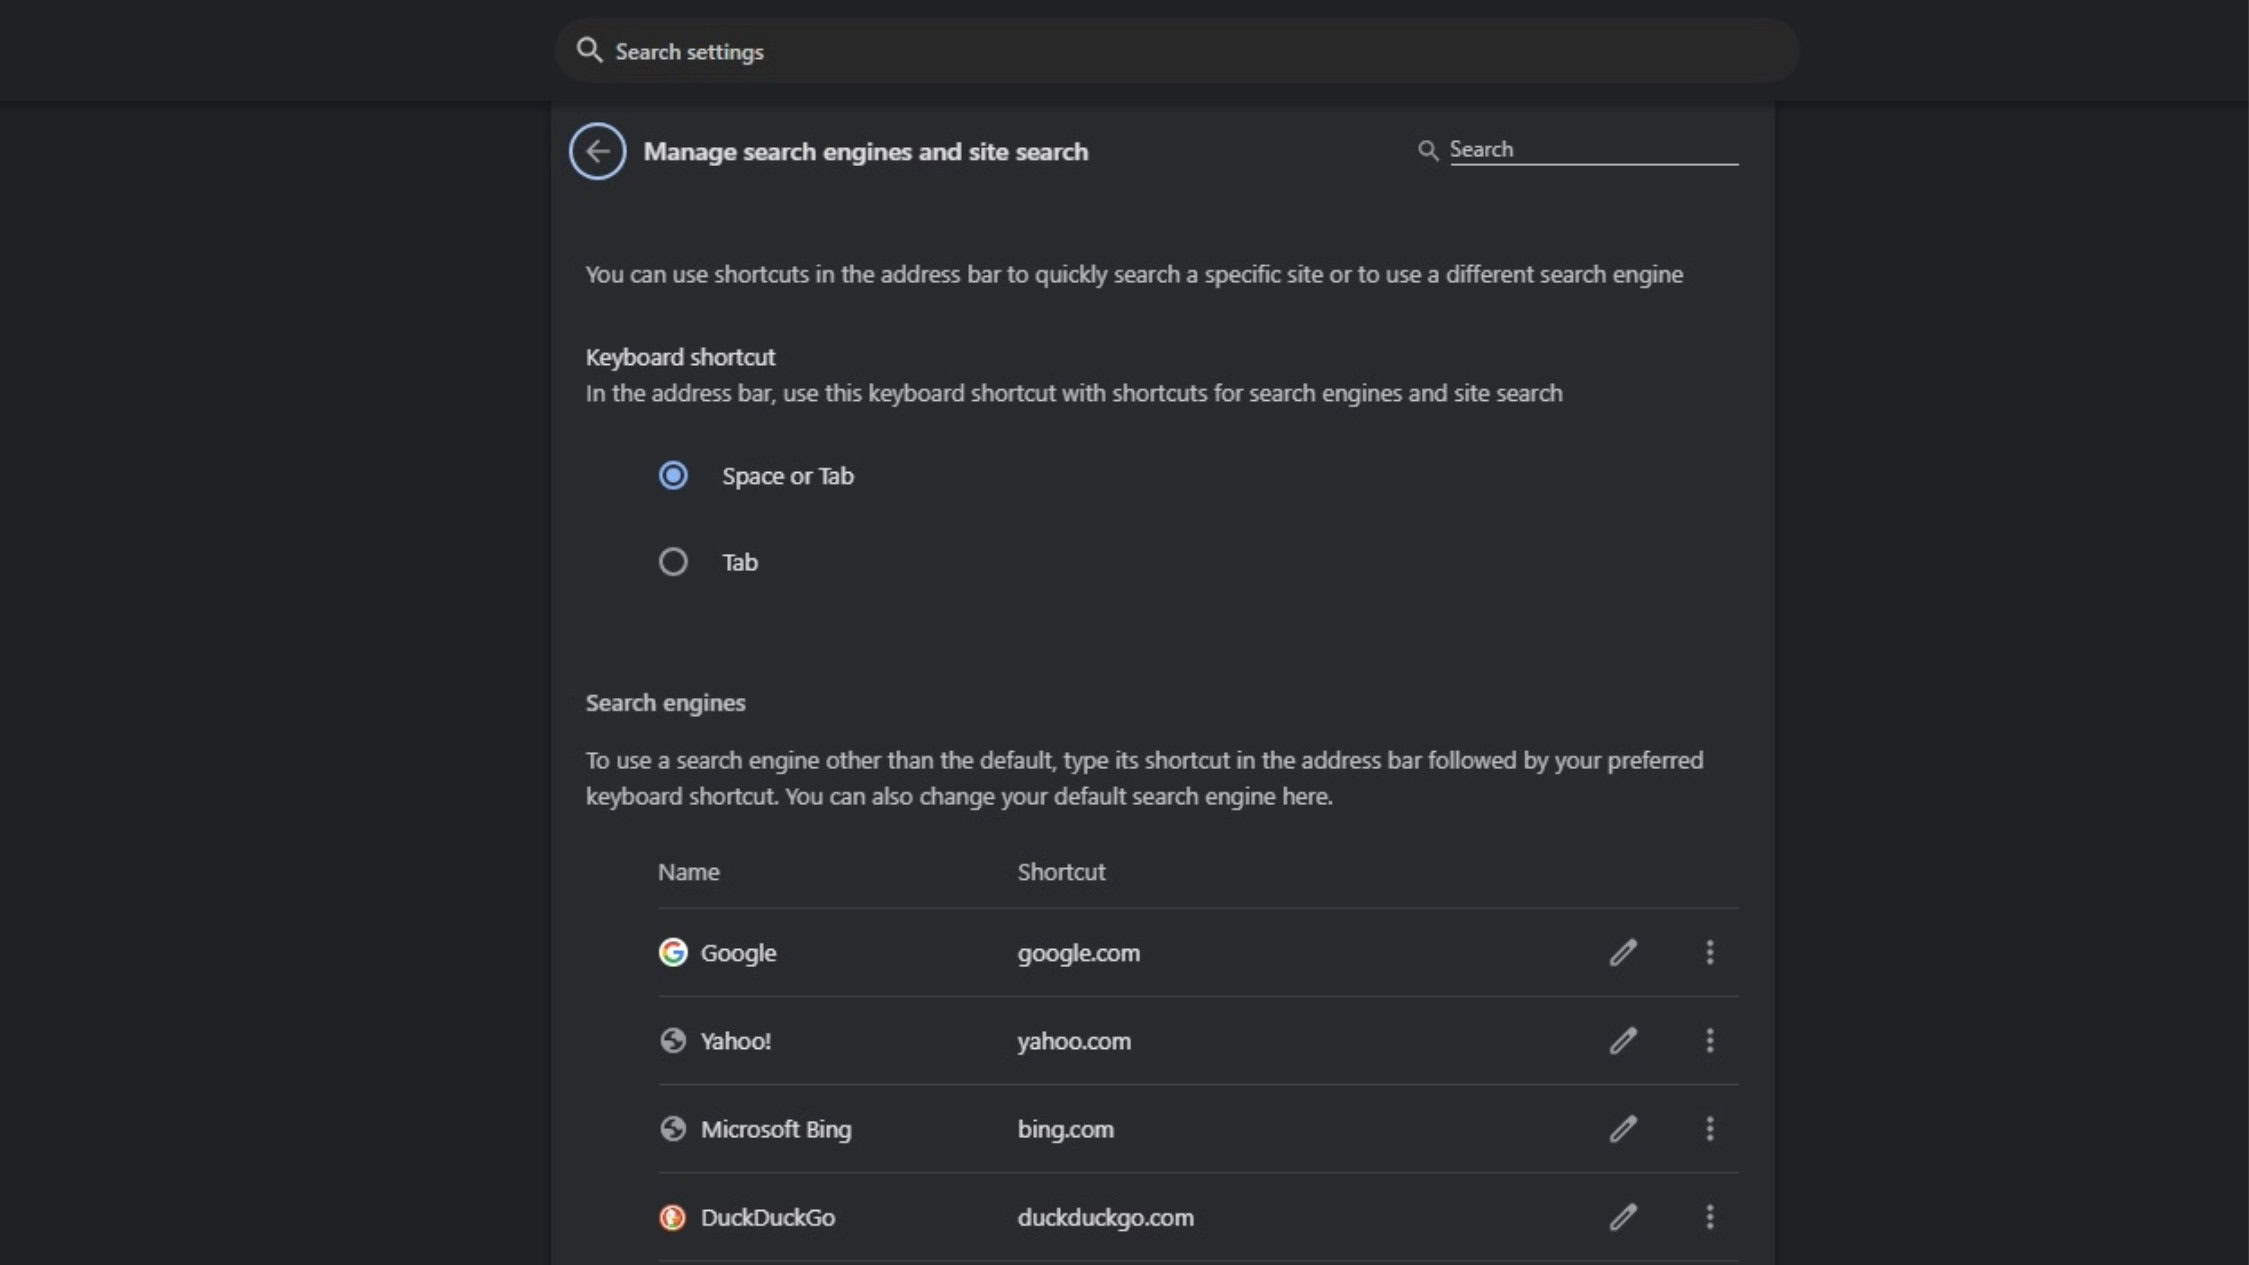
- Open Chrome and put chrome://settings/searchEngines in the search box.
- A new tab will open, go to Search Engine > Manage Search Engines and Site Search.
- Click on the Add button by the Site Search update. A new box will open.
- Fill in the form with the following:
- Name: AI Free Web
- Shortcut: @web
- {google:baseURL}search?q=%s&udm=14
- You’ll now see AI Free Web in the list.
- Click on the three stacked dots on the right side of this new option. Select Make Default.
Going forward, if you use the search box to trigger Google, you won’t get any of the Google AI overview results. Technically, these just bypass the main search results and filter out everything as opposed to truly disabling Google AI overviews. The result is about the same, however.
How to block Google AI overviews on mobile
Unfortunately, blocking Google AI overviews on mobile is a much more difficult prospect than on desktop. There’s no support for plugins, and while you can technically select a custom search engine, you can’t add the necessary filter string yourself. The good news is that there’s a workaround site called tenbluelinks.org, which aims to make it easier to rid the web of unwelcome AI overviews on mobile.
To quickly change Chrome (or any mobile browser that supports custom search engines) on Android you just need to visit the aforementioned site from your mobile device. From there:
- Open a new tab and search for anything in Google. This step can’t be skipped.
- Next, tap on the three dots menu in the bottom right corner.
- Choose Settings > Search Engine. “Google Web” will show up in the Recently Visited section.
- Once you select Google Web you’ll no longer see the AI overviews in search results through the main search bar.
Firefox can hide Google AI overviews for you on mobile

While you can use the above method in Firefox, it’s also possible to change it manually in Firefox:
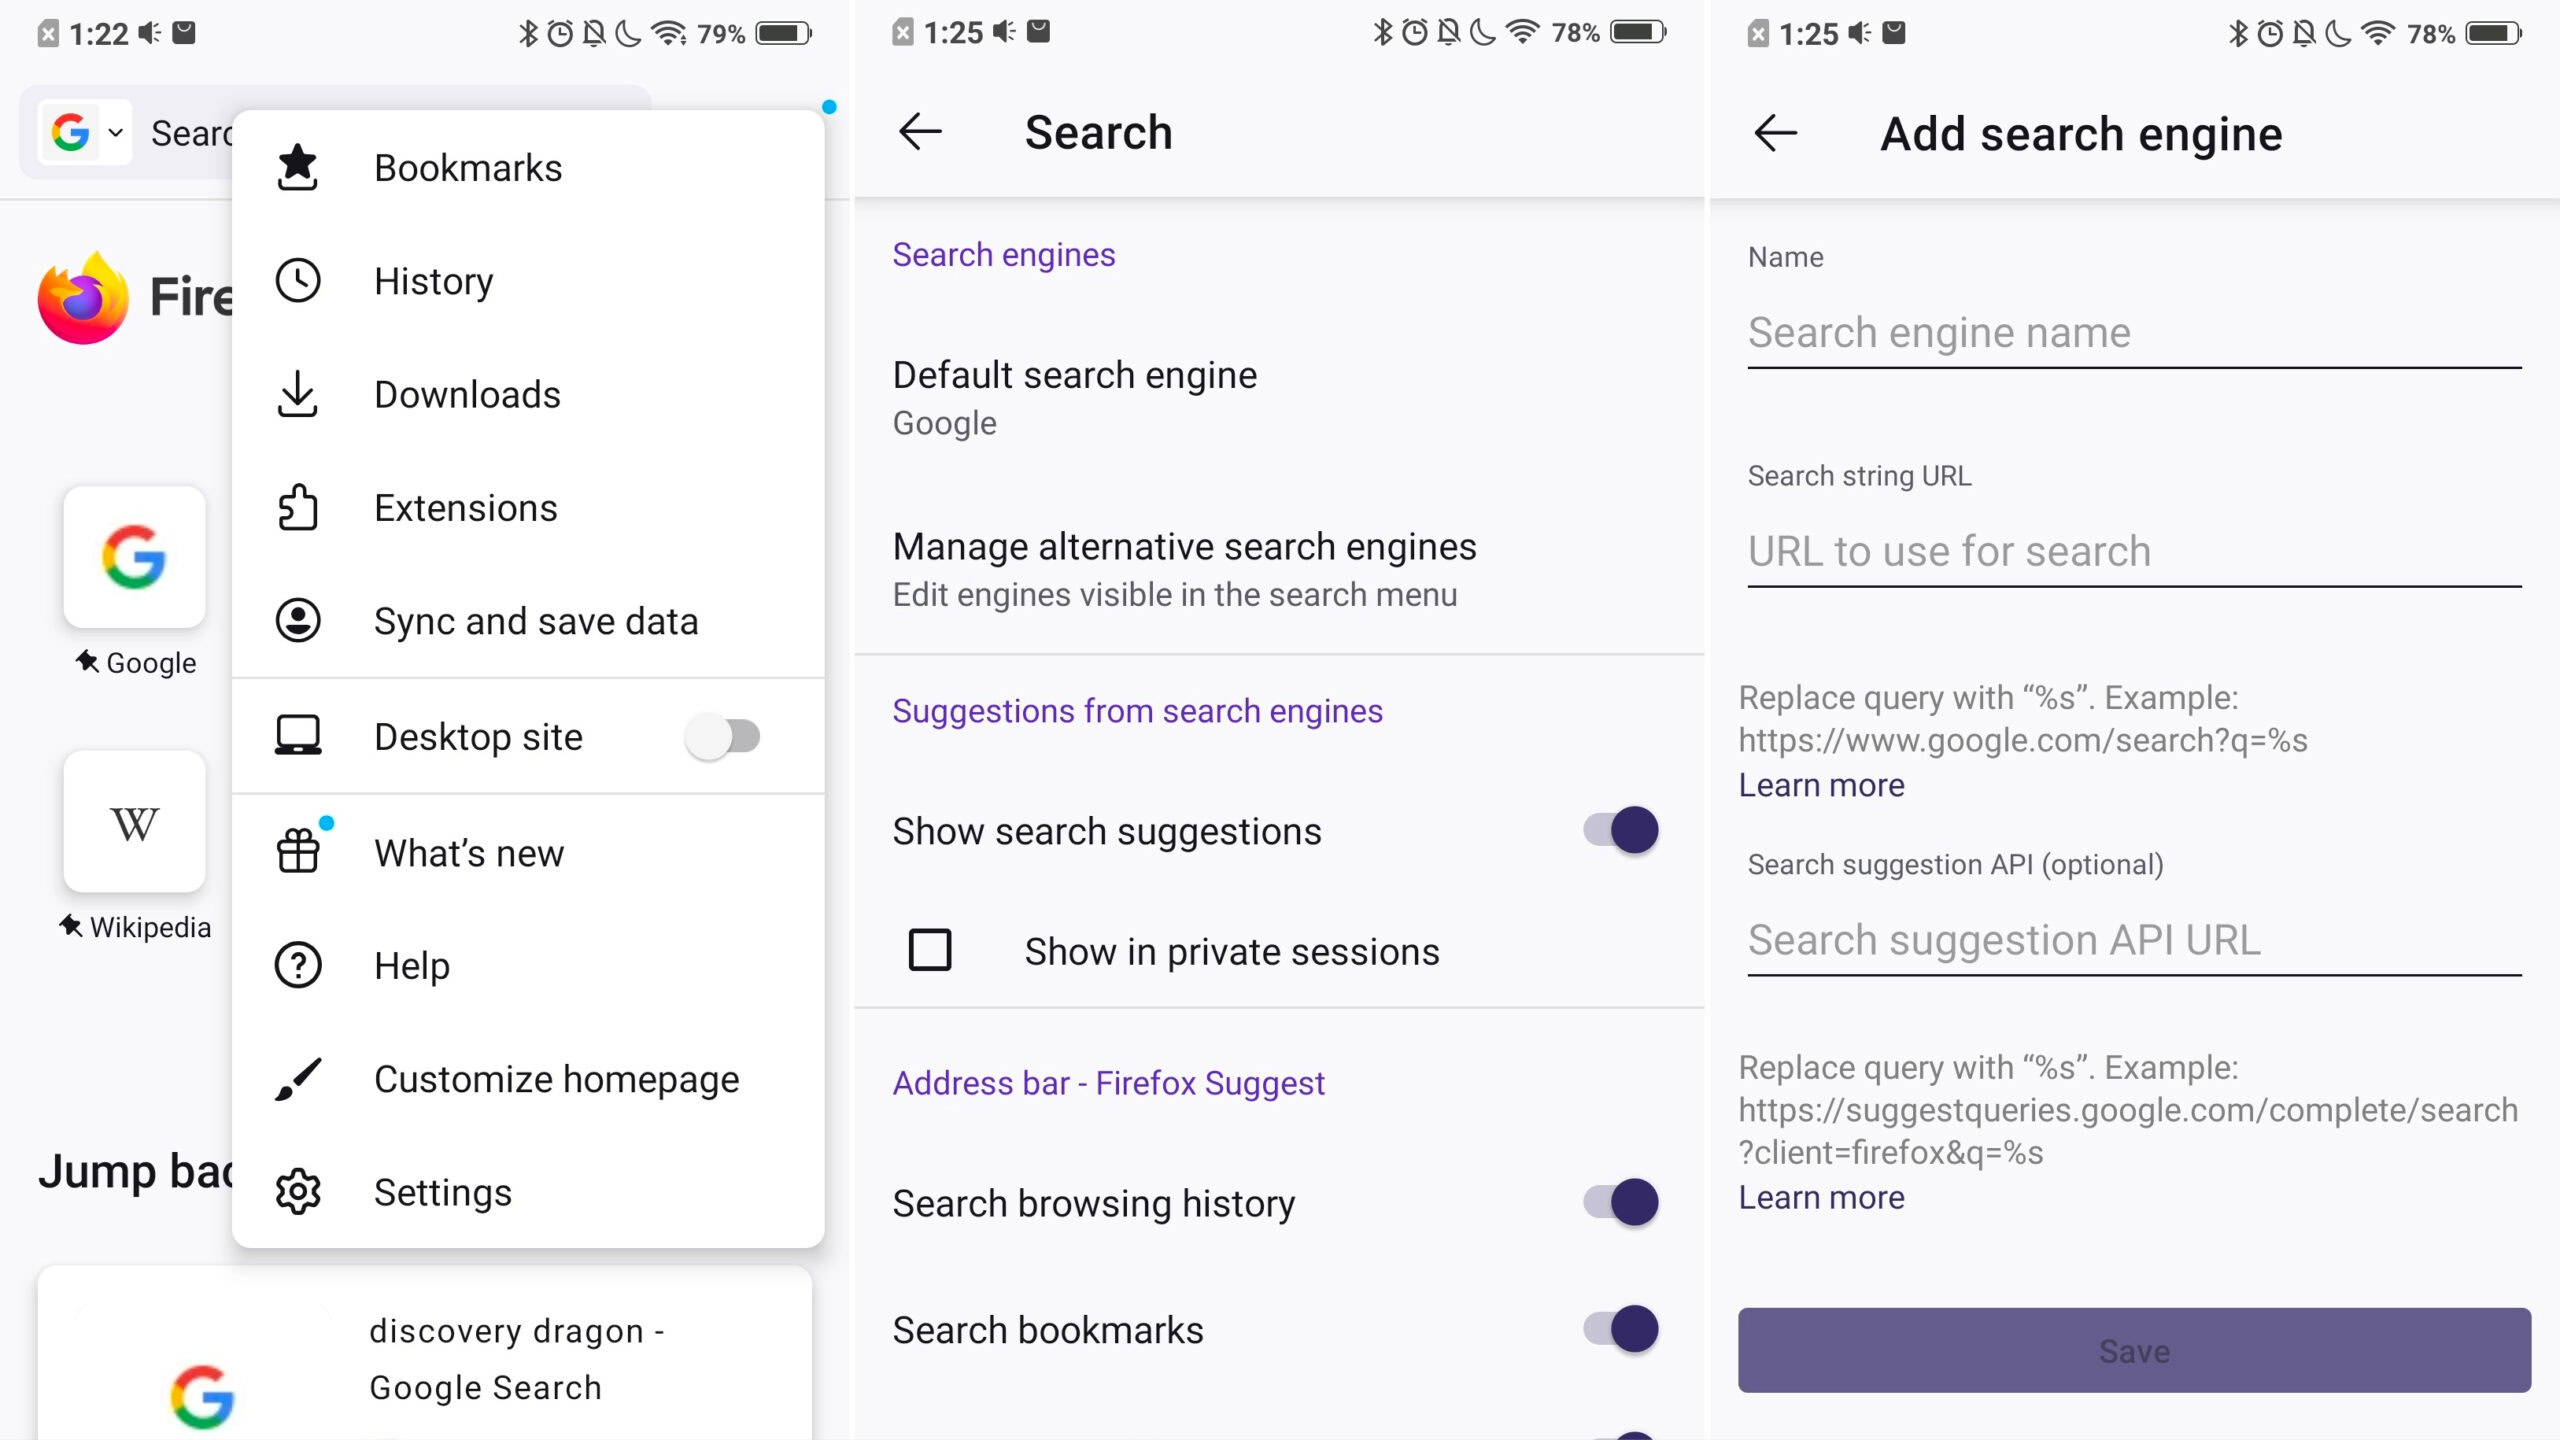
- Open Firefox and go to the three stacked dots in the upper-right corner. Select Settings.
- Select Search. In the new window, you’ll want tap on Default Search Engine.
- In the new screen, you’ll be presented with your existing options.
- Tap Add Search Engine.
- Fill in the name with AI-free Web and search string with google.com/search?udm=14&q=%s
- Tap Save, and you’re done!


