If you’re looking to adjust the aspect ratio of a video in Premiere Pro, you’re in the right place. We’ve created this guide to teach you how to do it.
When editing a video, it’s crucial to ensure you’re using the correct aspect ratio for the platform through which you plan to share the video.
For example, a modern film might have an aspect ratio of 1.85:1 or 2.39:1, while a YouTube video will have a more narrow aspect ratio of 16:9. If you’re working on a TikTok or Instagram Reel, that aspect ratio will need to be flipped around to fit a vertical frame of 9:16.
So, how do you set a specific aspect ratio in Premiere Pro? Follow the steps below to get started.
What you’ll need:
- Adobe Premiere Pro
- A Creative Cloud subscription
The Short Version
- Open your project in Adobe Premiere Pro
- Click File
- Choose New
- Click Sequence
- Go to the Settings tab
- Adjust the frame size
- Hit OK to confirm
How to change the aspect ratio in Adobe Premiere Pro
-
Step
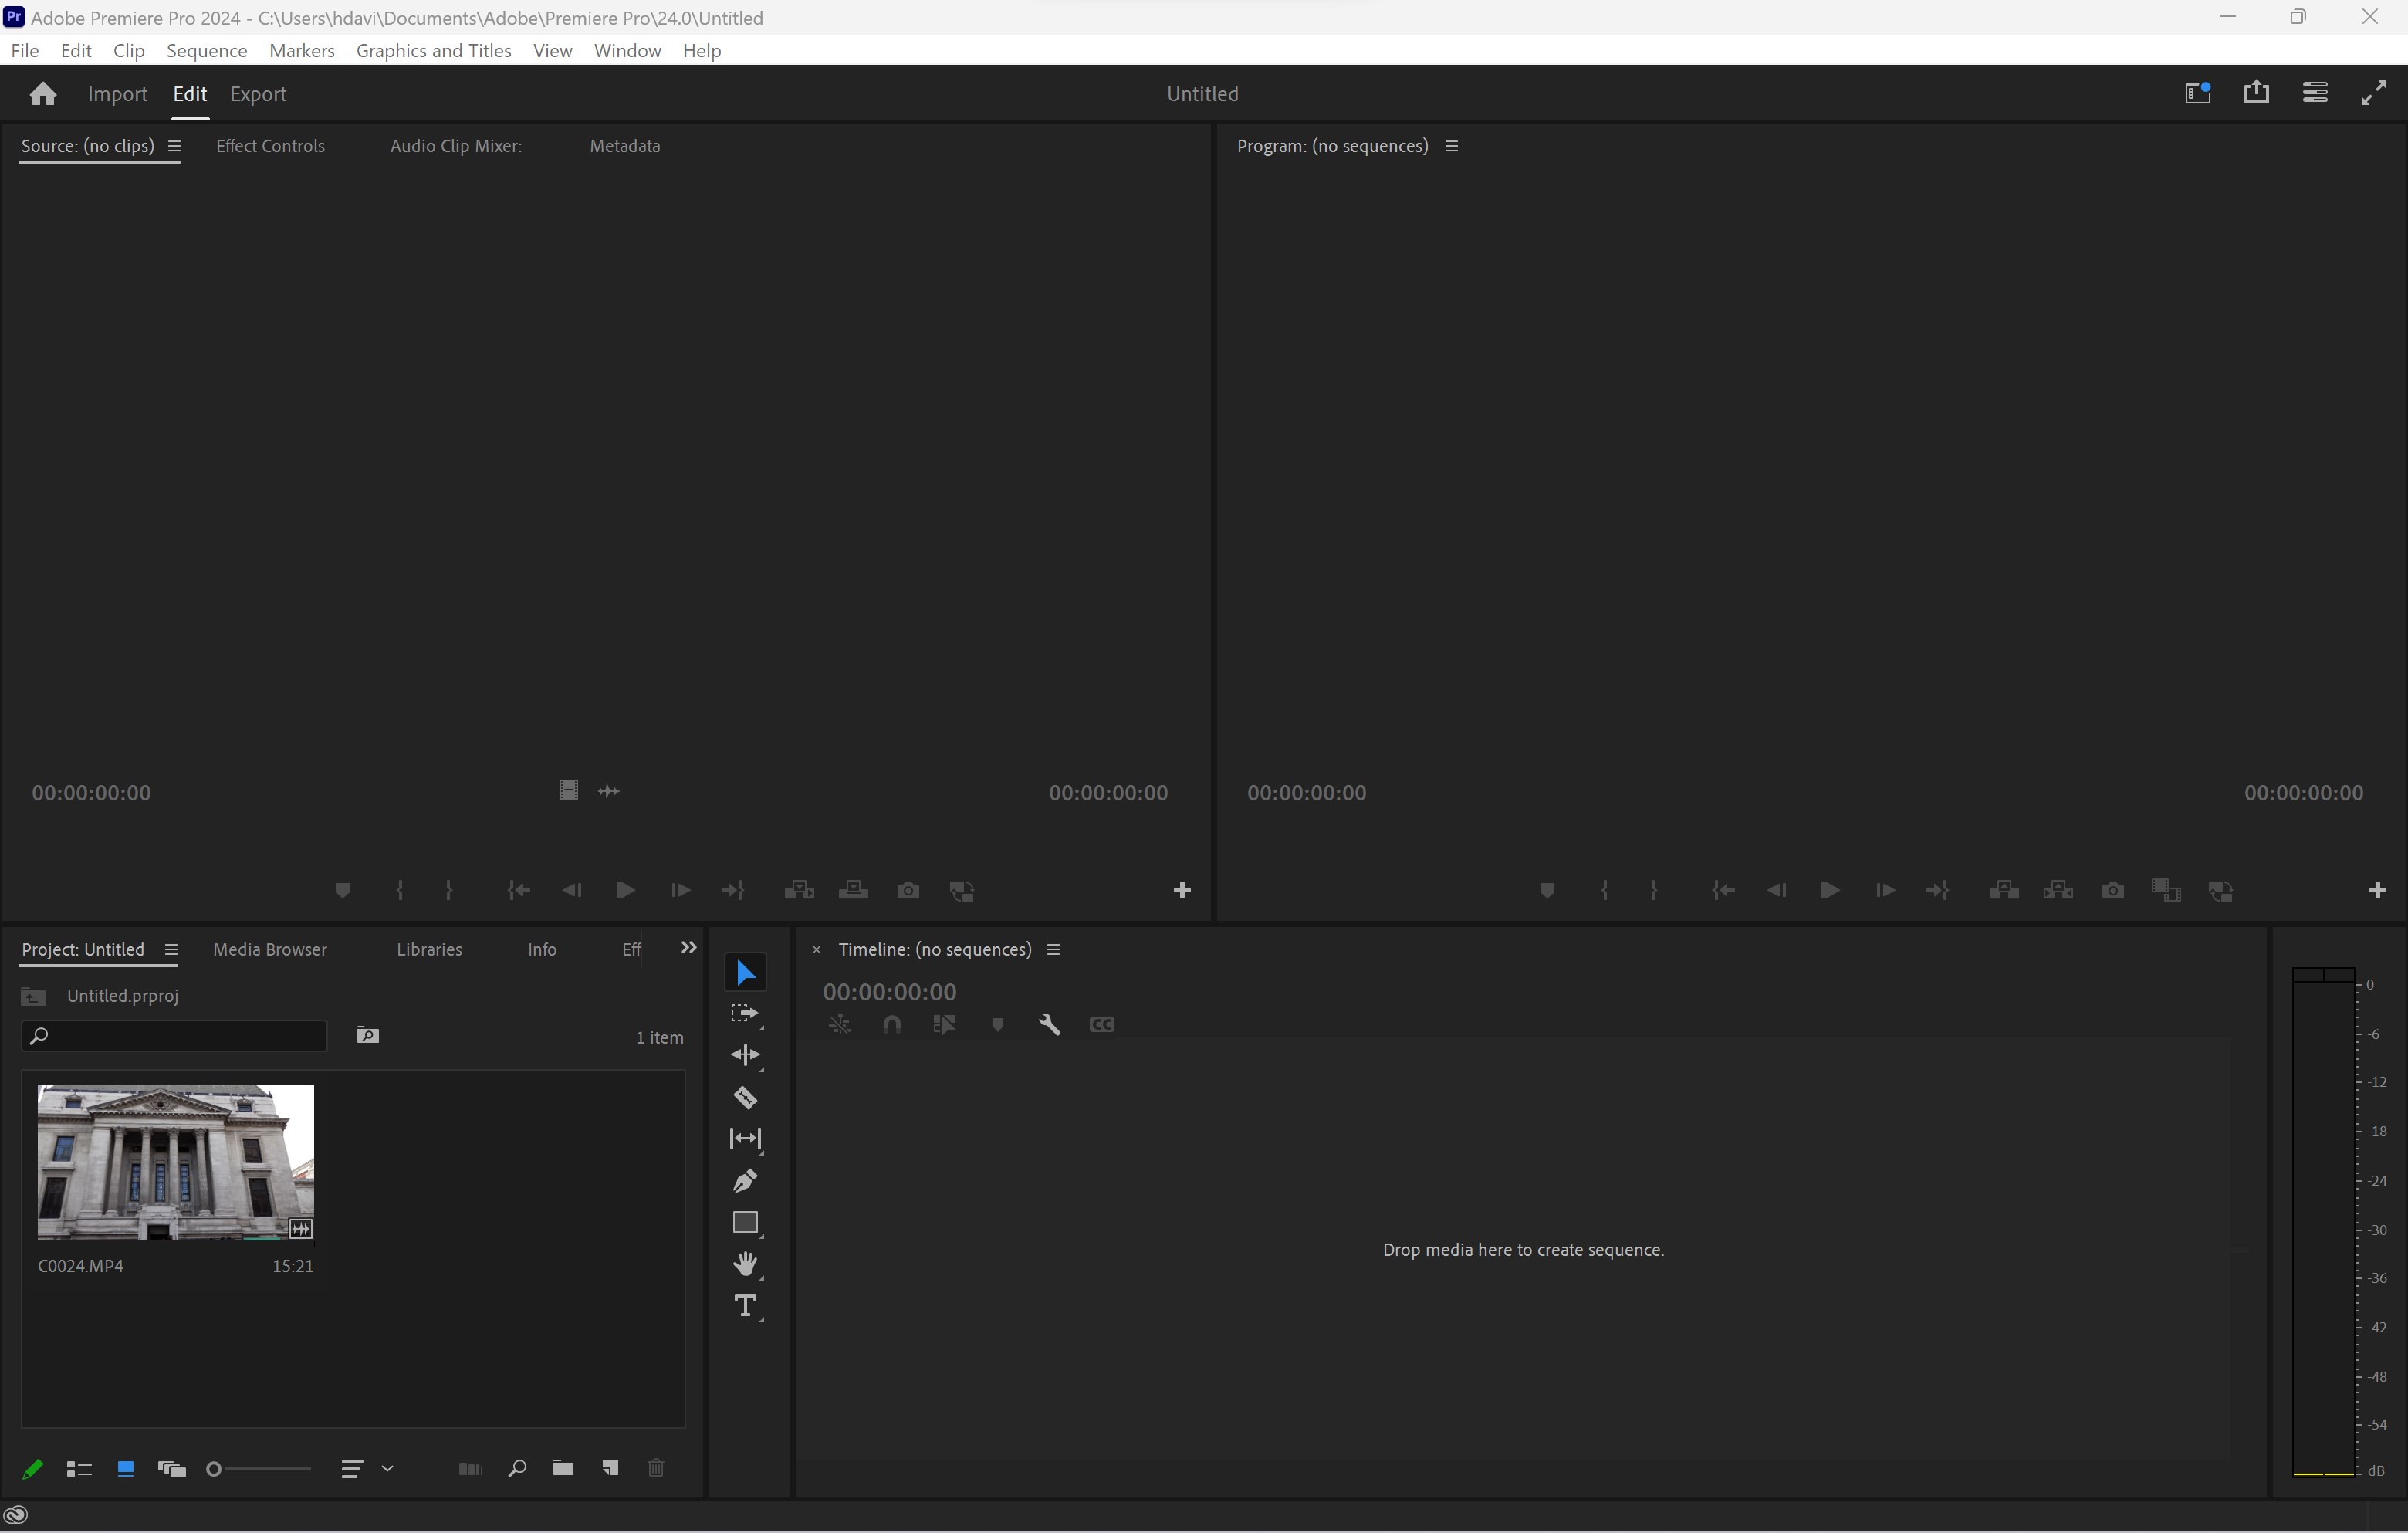
1Open your project in Adobe Premiere Pro
Or create a new project.
-
Step
2Click File
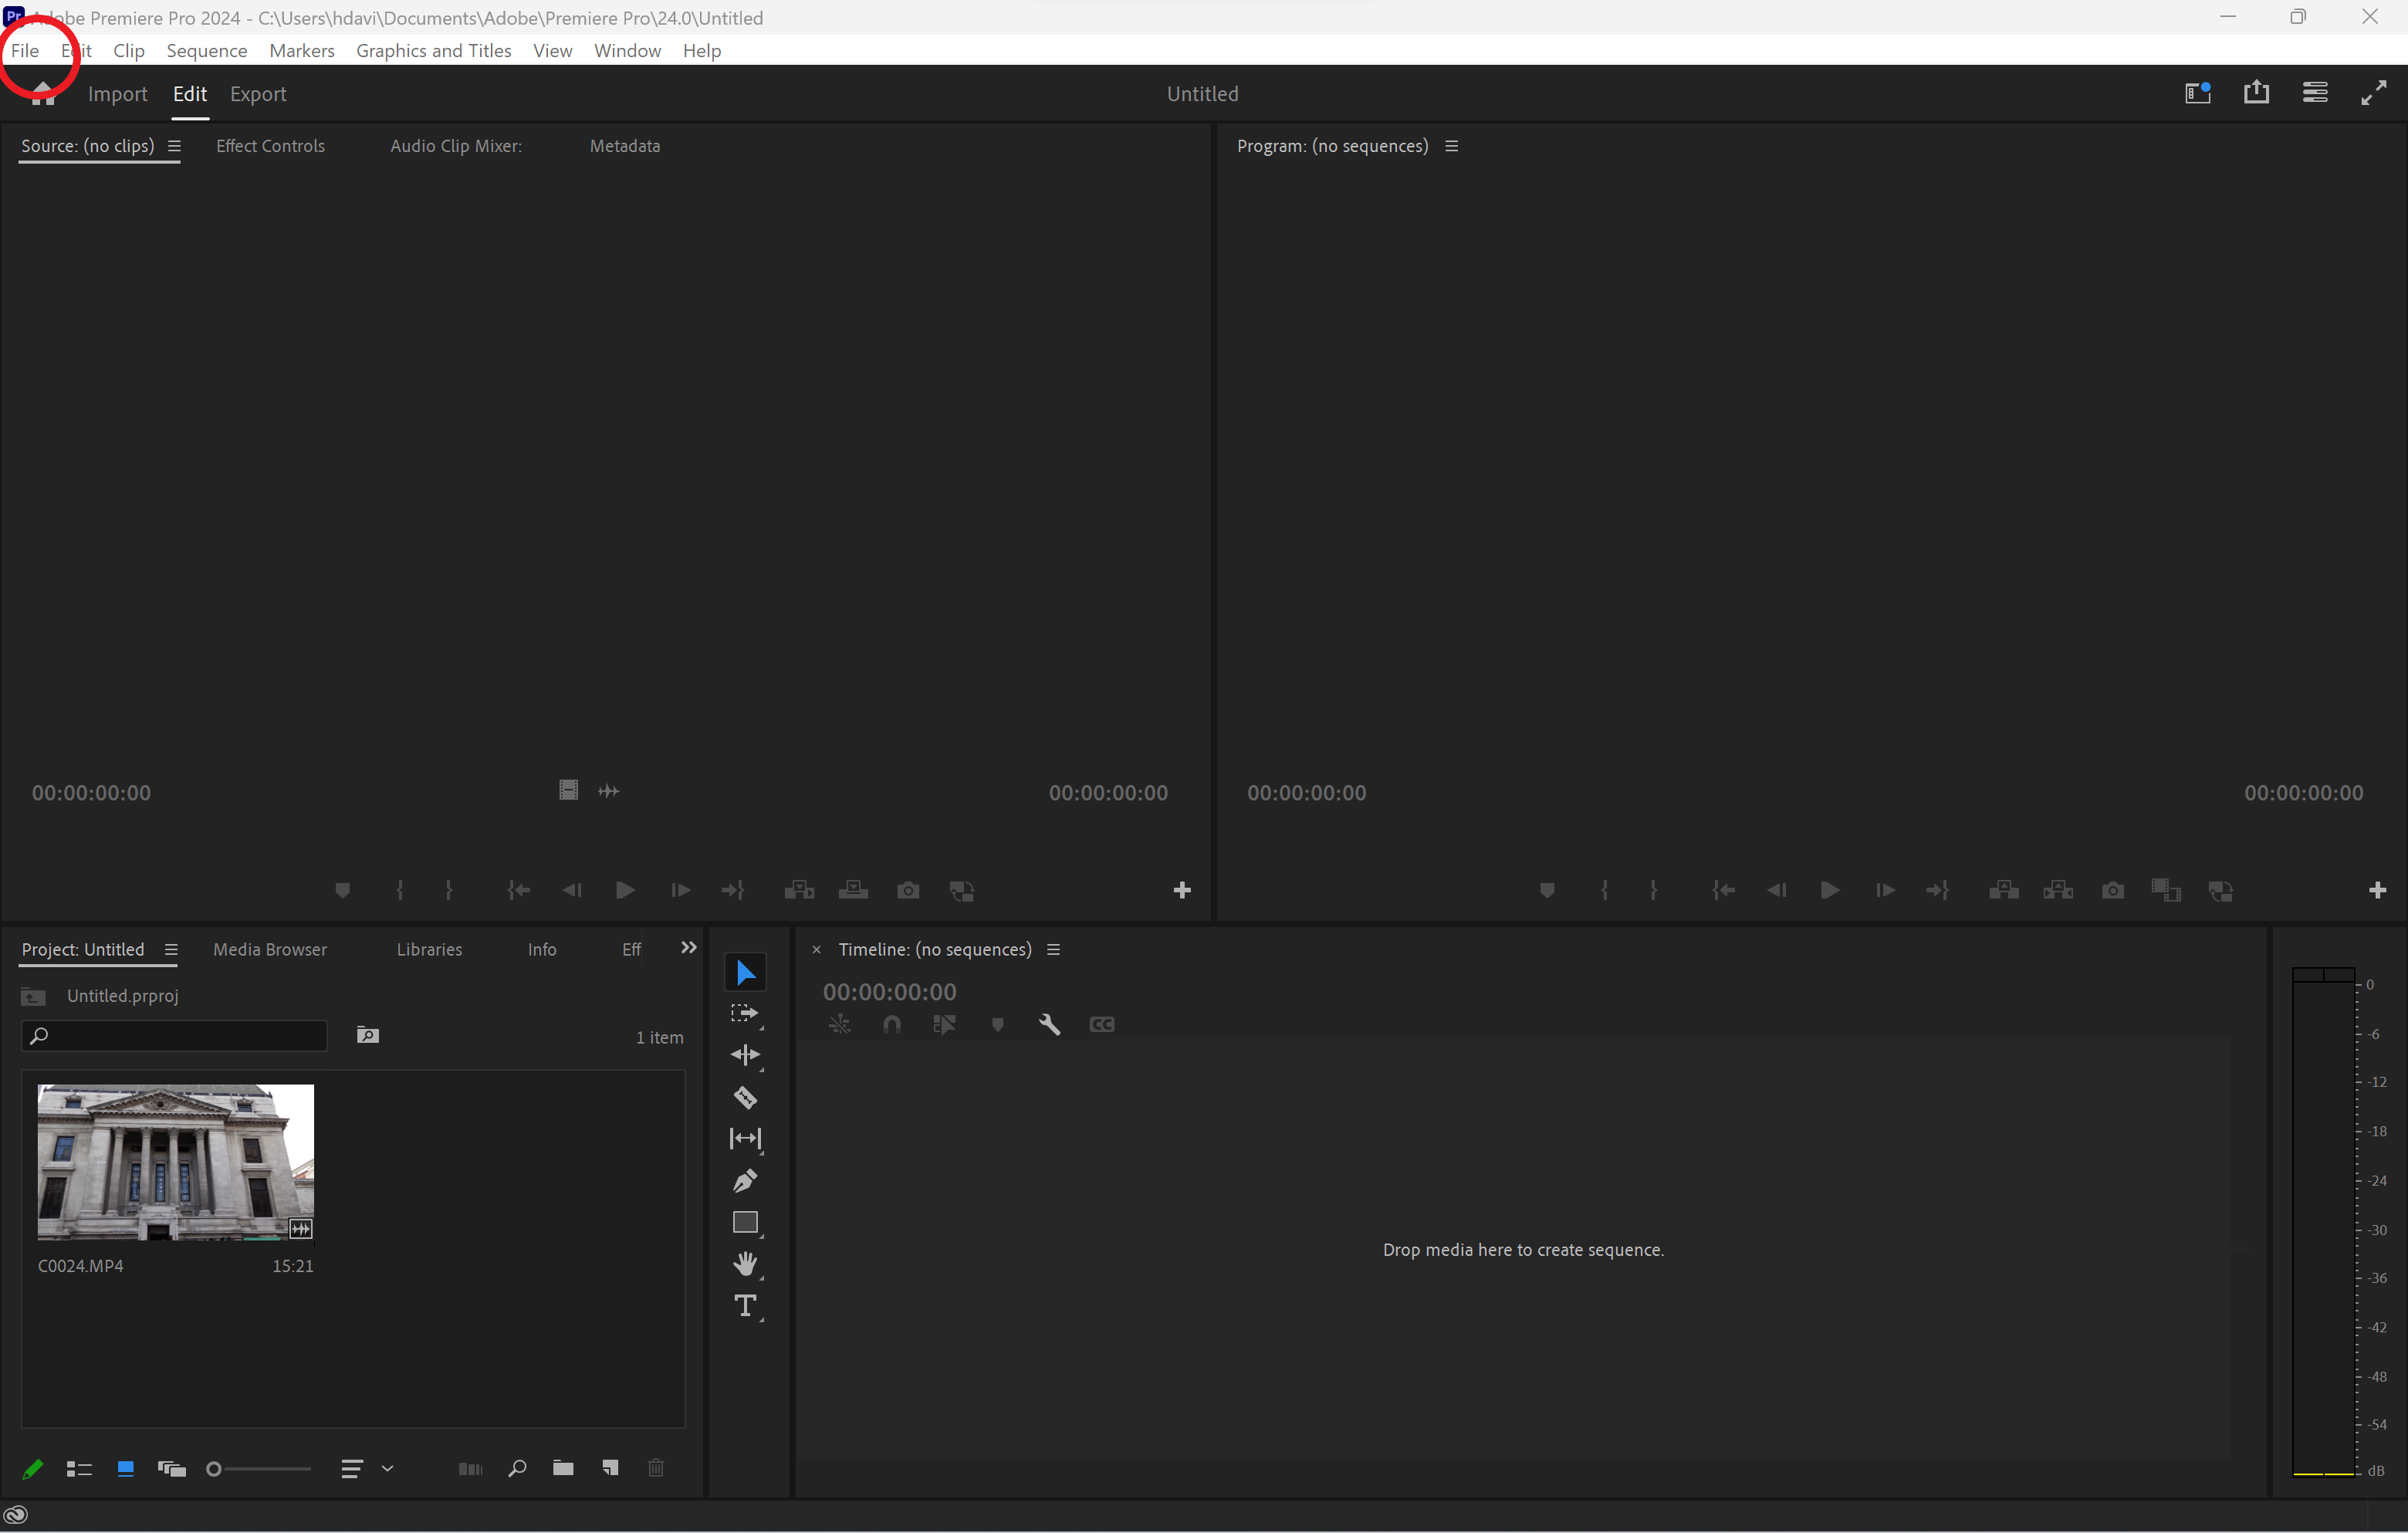
You can find this option in the top left corner of the menu bar.

-
Step
3Choose New
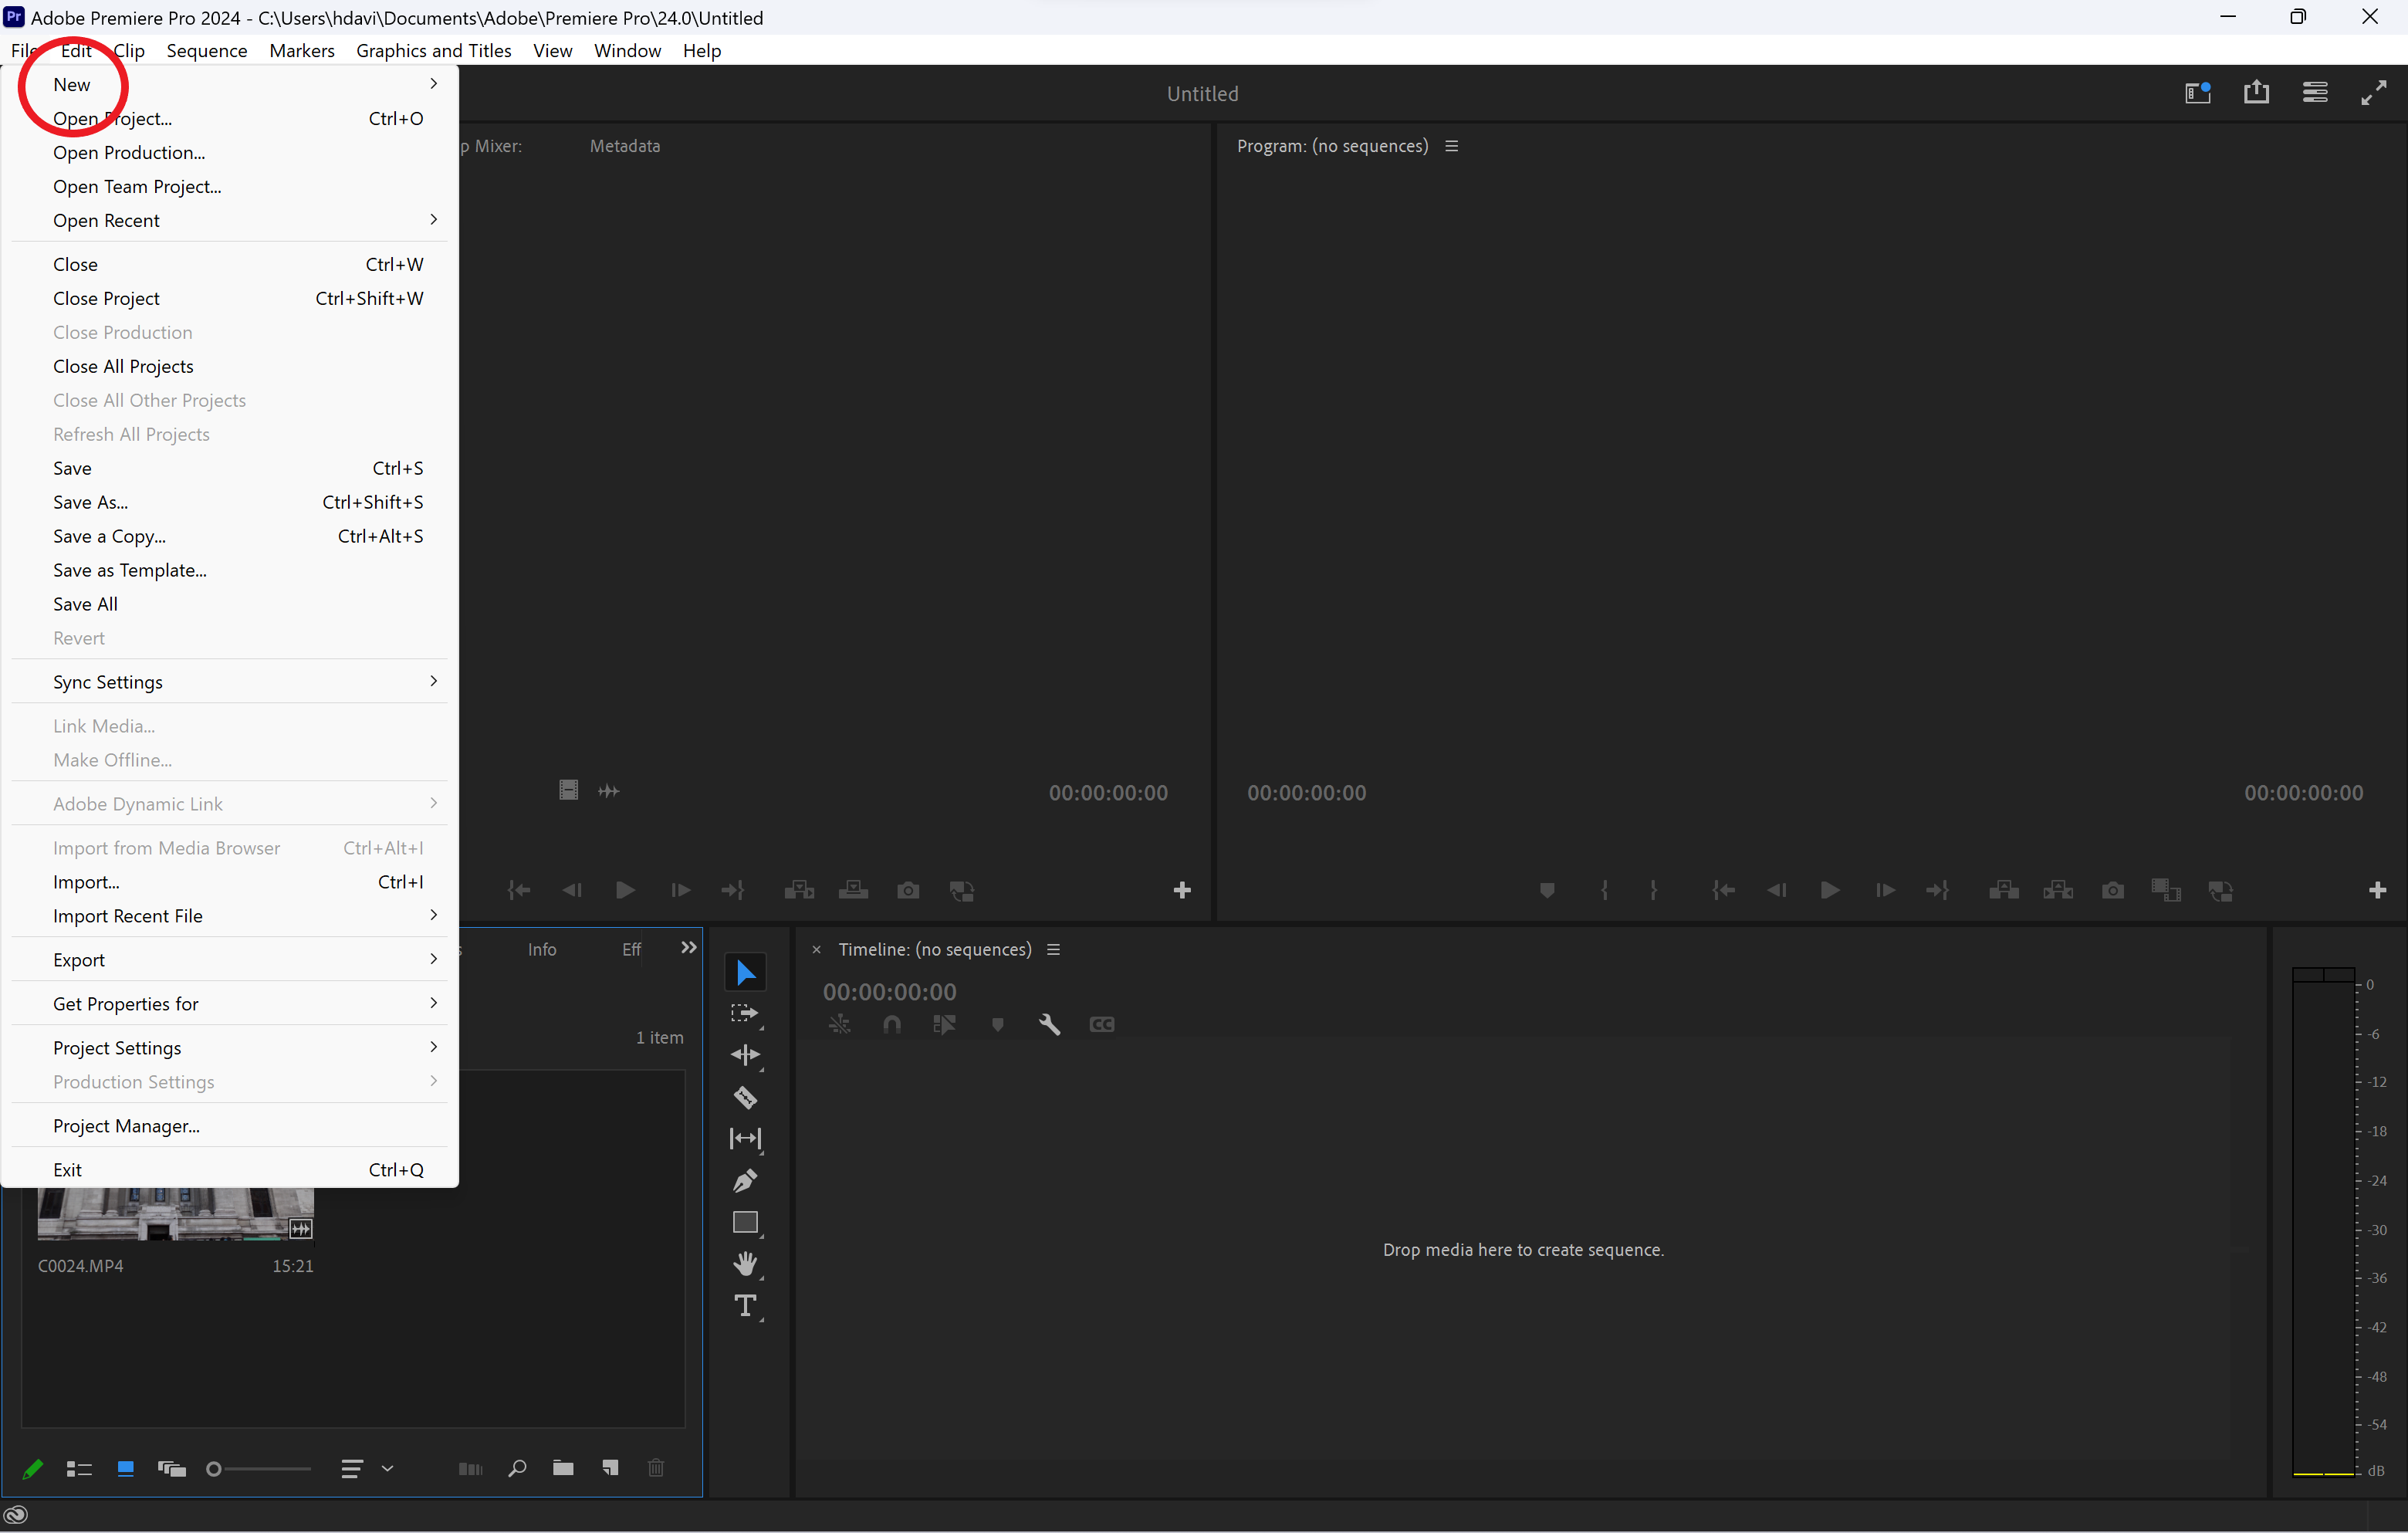
 This is the first option on the drop-down menu.
 -
Step
4Click Sequence

 You can also skip the first 4 steps and hold Ctrl+N to get to this stage.
 -
Step
5Go to the Settings tab

This is the second tab available.

-
Step
6Adjust the frame size
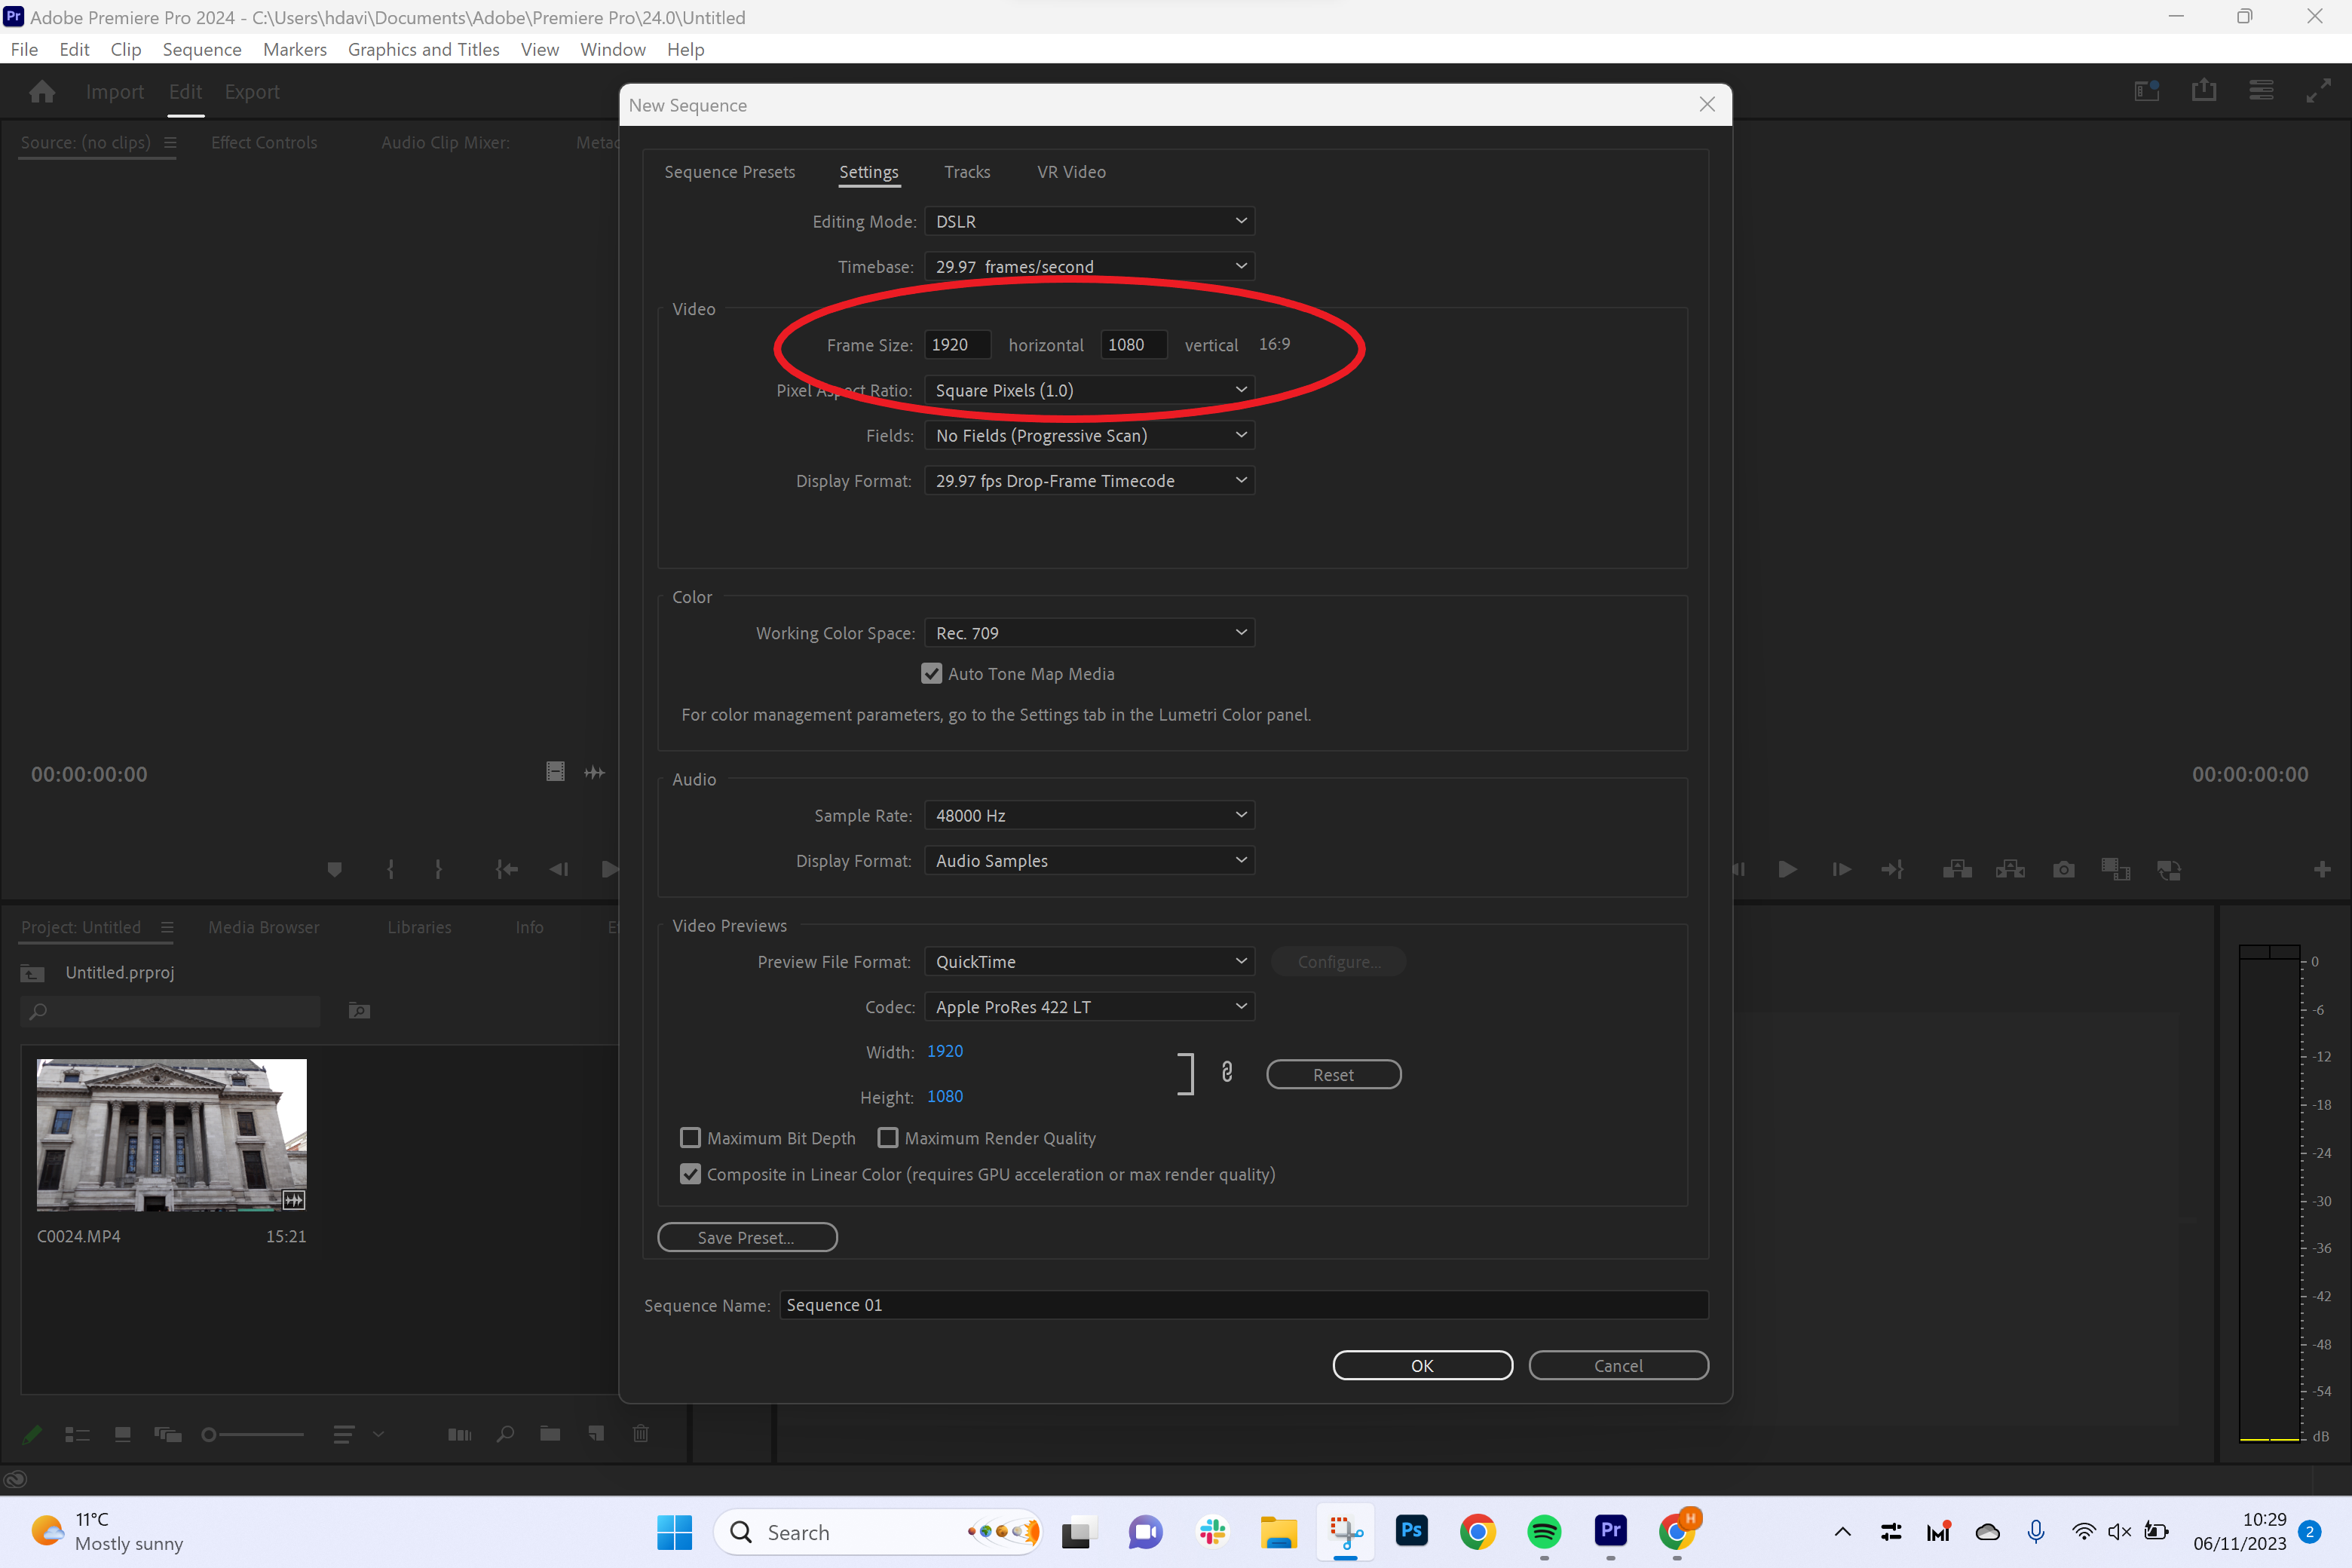
Tweaking the horizontal and vertical dimensions will automatically change the aspect ratio.

-
Step
7Hit OK to confirm
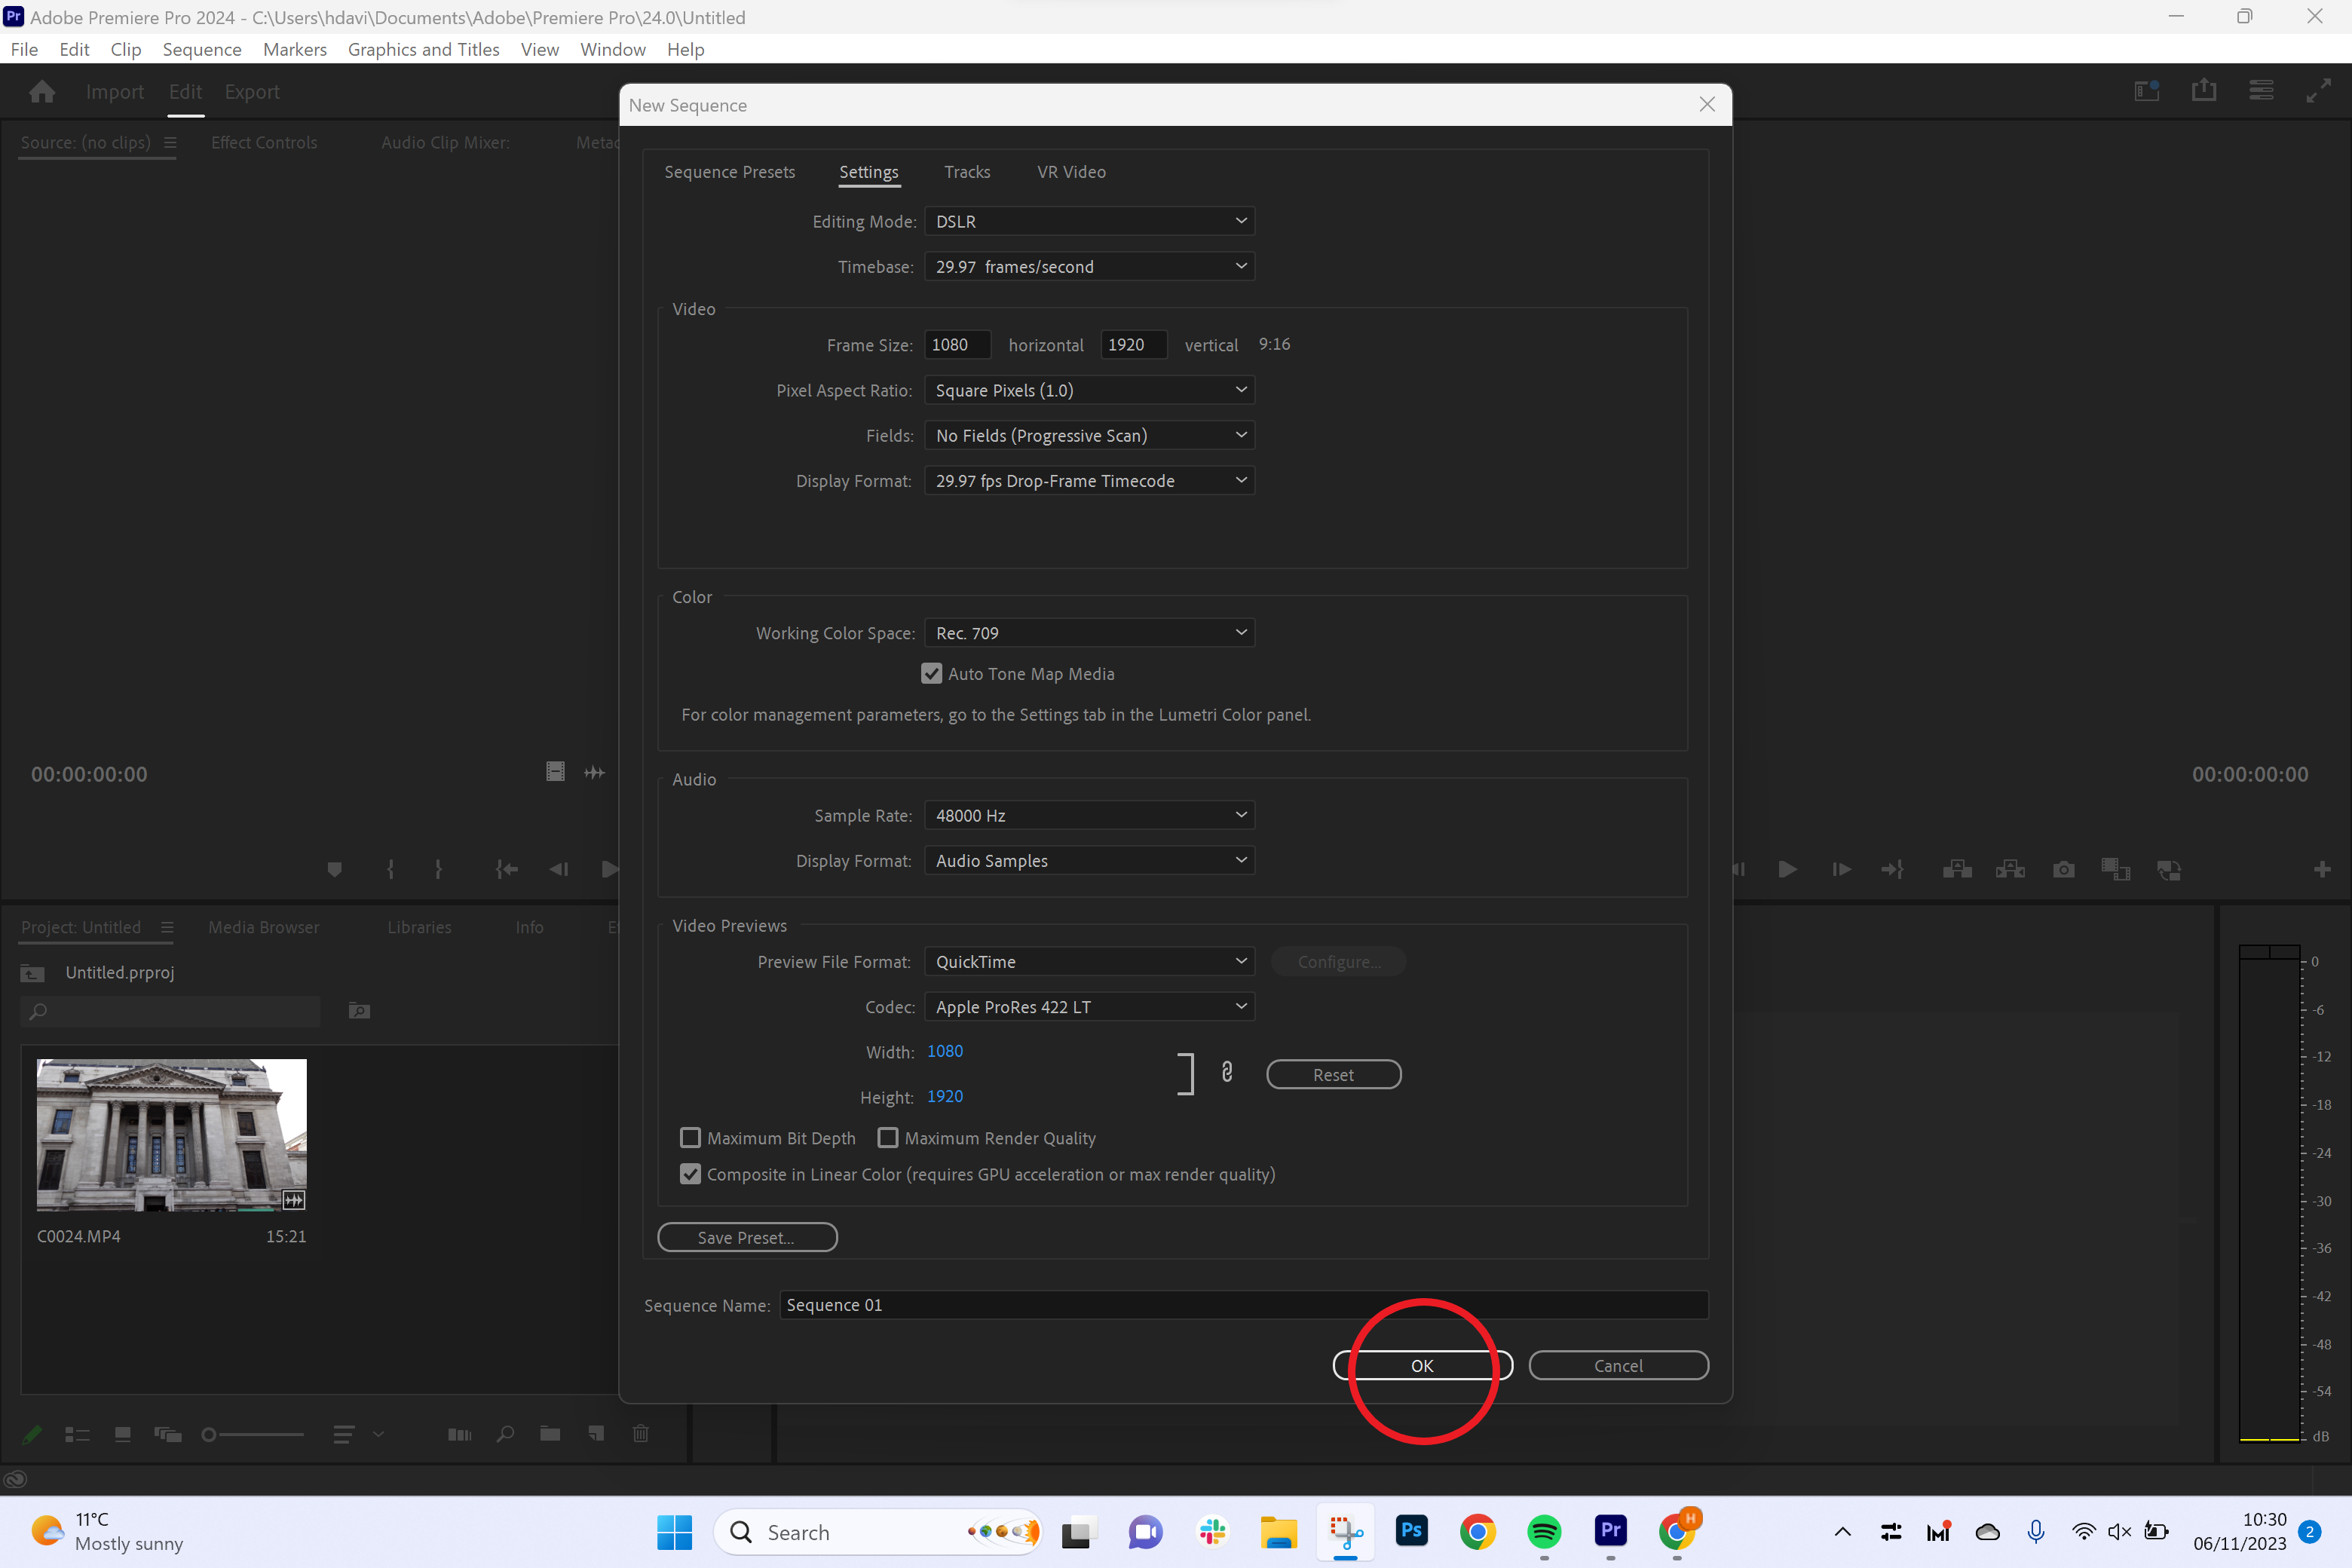
This will set your new aspect ratio.

Troubleshooting
While you can adjust the aspect ratio for social media using the process above, Adobe also offers a smart tool. The Auto Reframe tool automatically trims the aspect ratio while ensuring your subject remains centered in the frame.


