Safari Profiles are a great way to separate your personal, school and work lives in the Apple browser. Keep reading to learn how to use this iOS 17 feature.
Having multiple Safari Profiles allows you to separate your tabs, tab groups, browsing history, favourites and extensions by category. This makes it easier to focus on work with one profile and switch to your personal tabs when you clock off.
Scroll down to learn how to create a Safari Profile or check out the troubleshooting section of this guide for tips on how to switch between profiles in Safari.
What you’ll need:
- An iPhone XR/XS or above
- iOS 17 installed
The Short Version
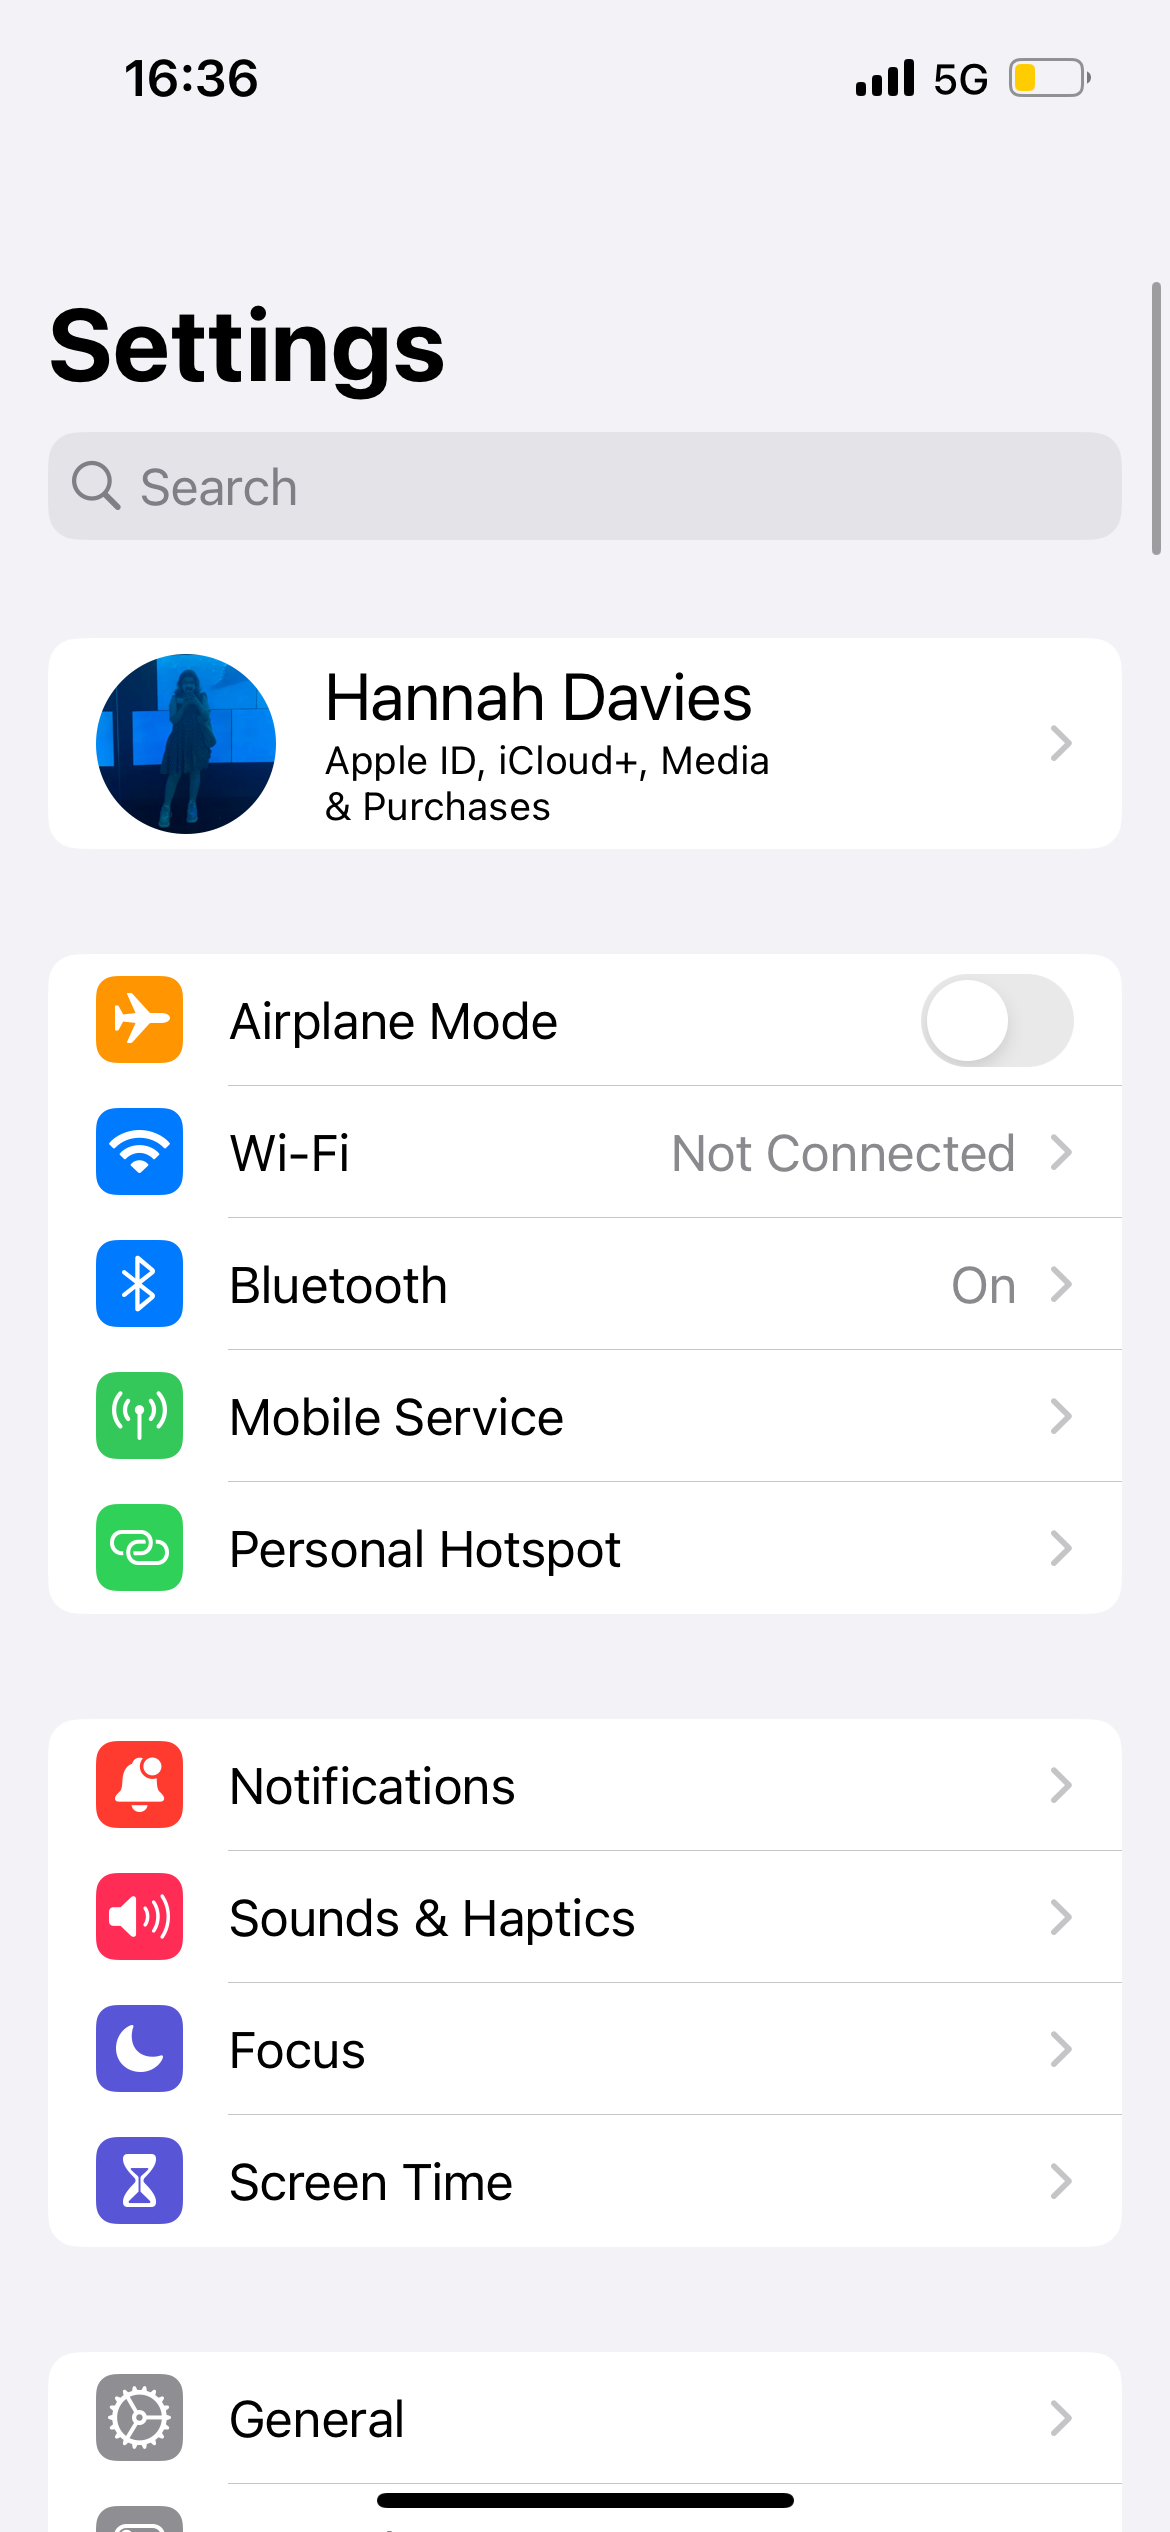
- Open Settings
- Tap Safari
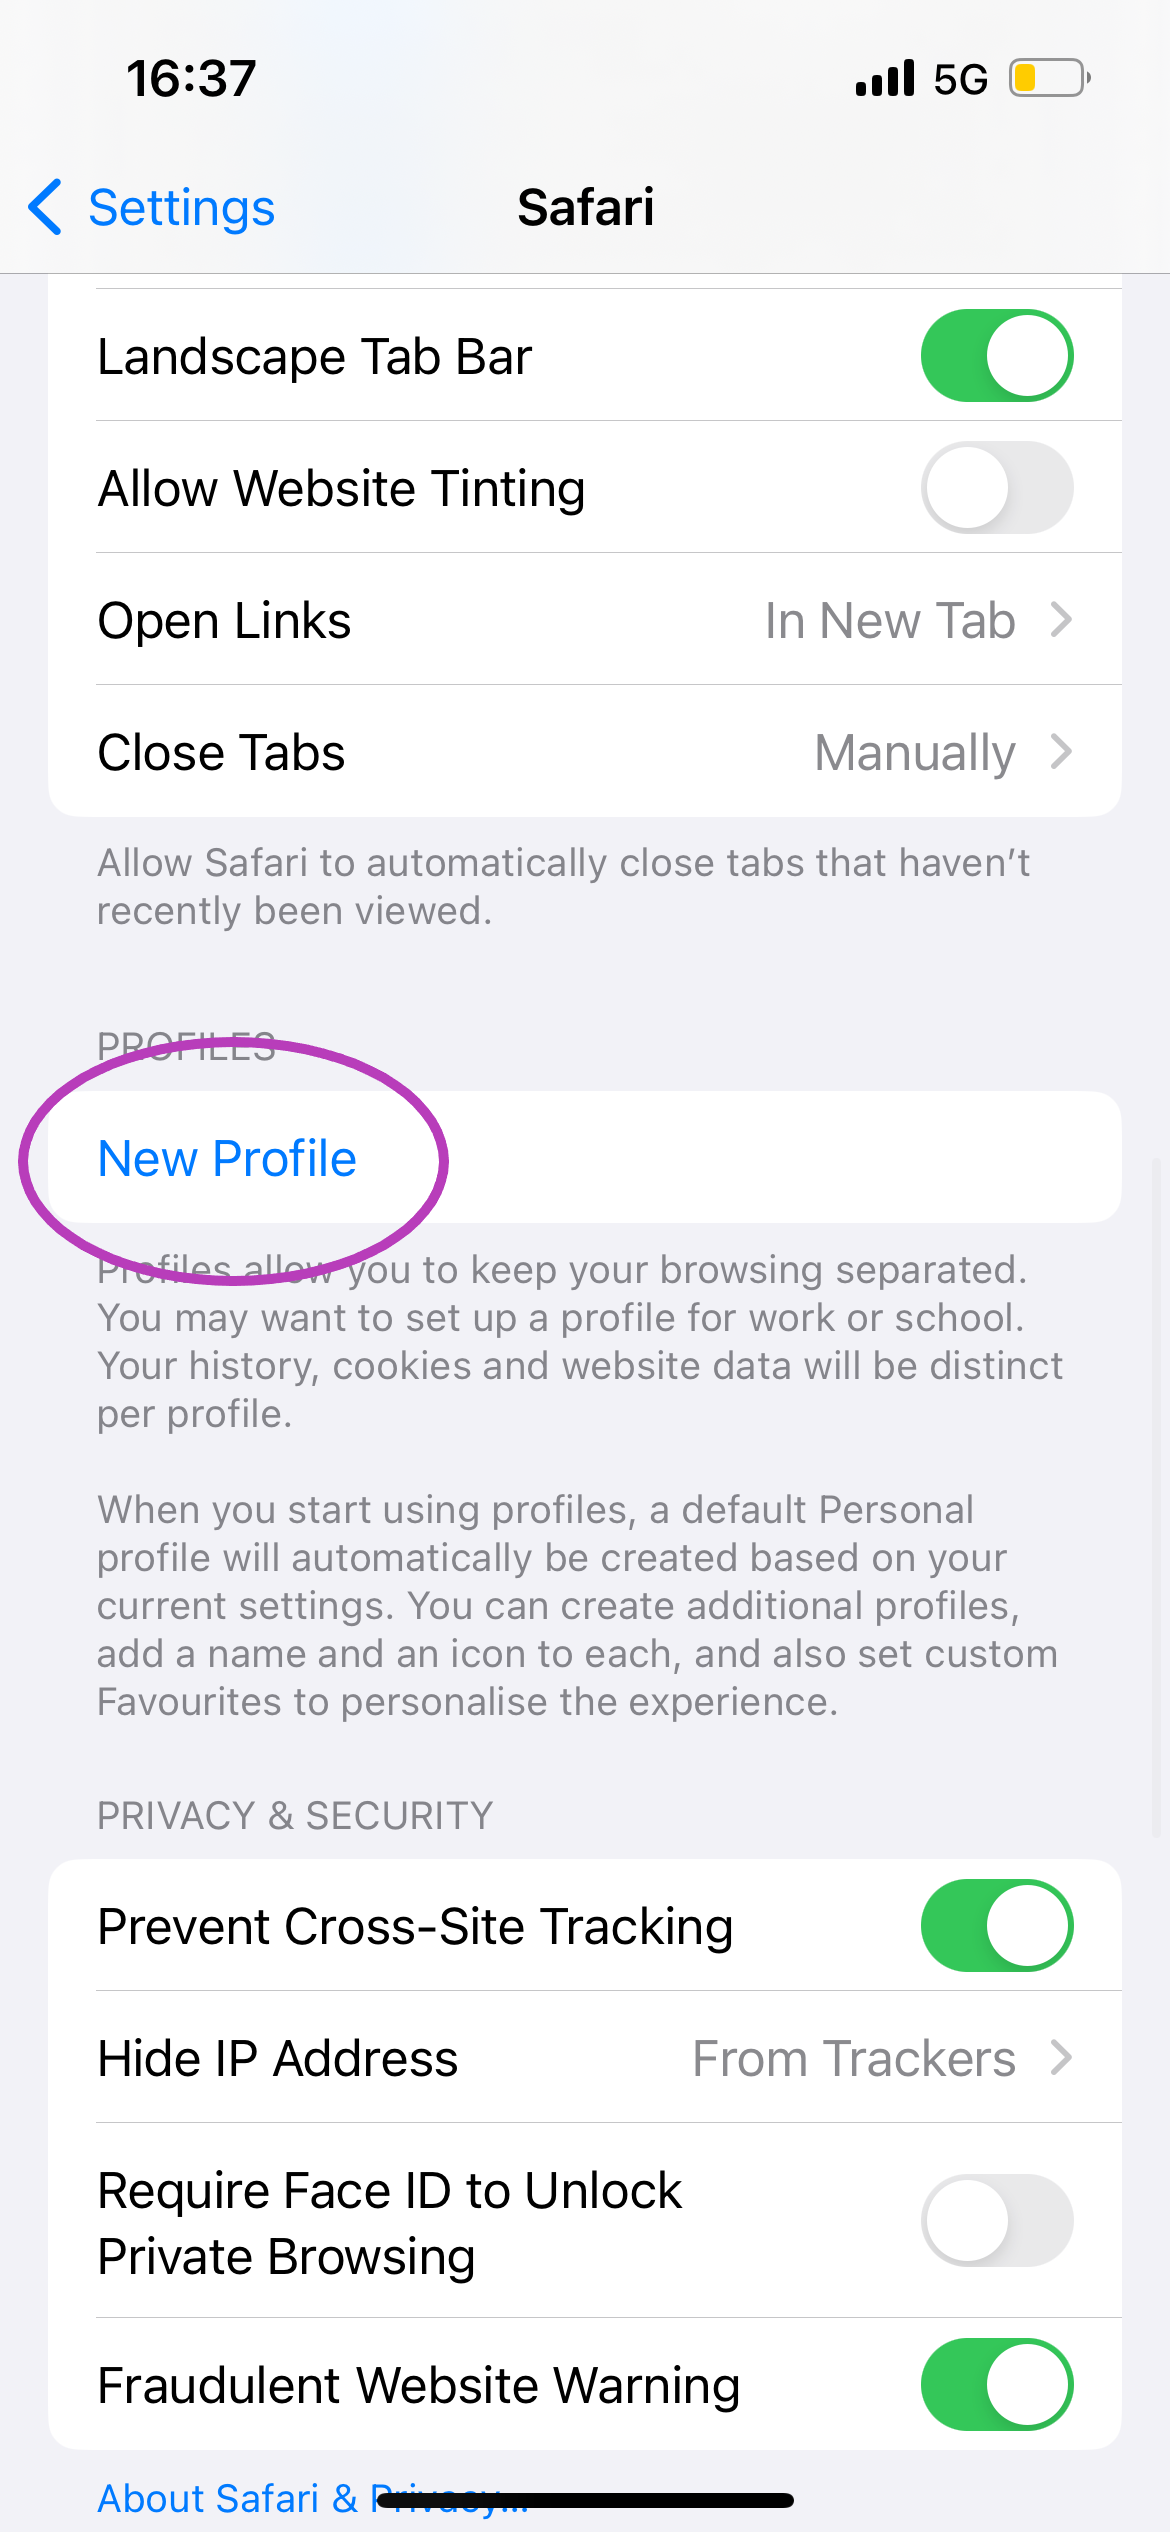
- Select New Profile
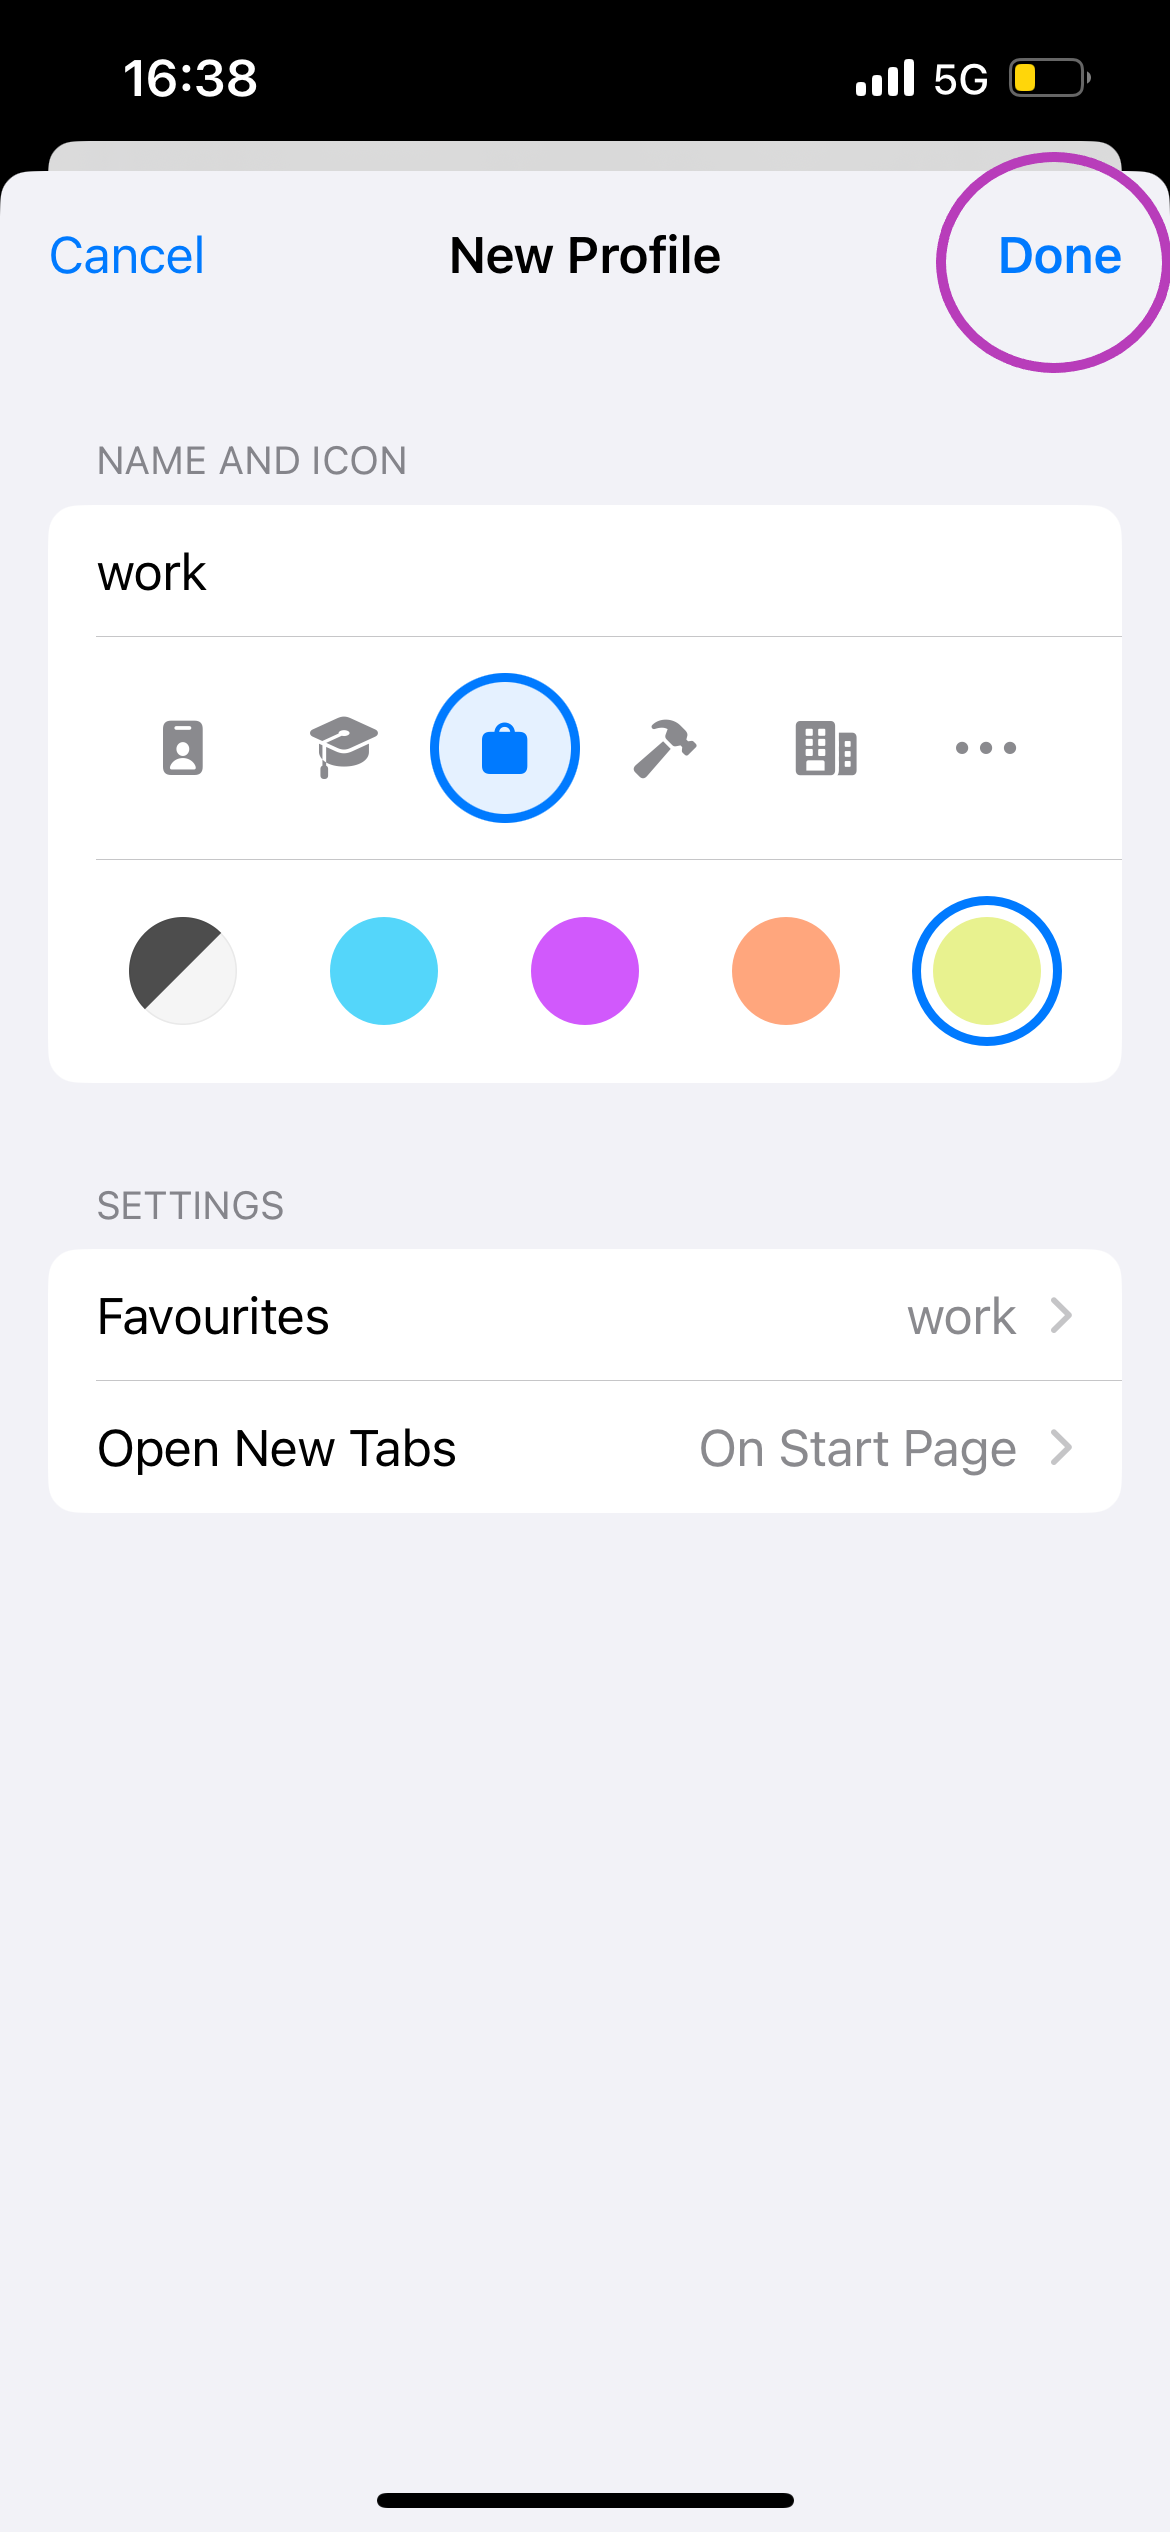
- Name your profile
- Tap Done
How to create Safari Profiles on iPhone or iPad
-
Step
1Open Settings
Make sure your phone is updated to run iOS 17 if you haven’t already.

-
Step
2Tap Safari

You’ll need to scroll down to the apps section of your settings.

-
Step
3Select New Profile

You’ll again need to scroll down a bit to find this section.

-
Step
4Name your profile

You can also choose an icon and colour for your profile.

-
Step
5Tap Done

That’s it! Now just head to Safari to use this feature.

Troubleshooting
To switch between the profiles you’ve made, simply open Safari, tap the icon at the bottom centre of the screen and tap Profile. Then, choose whichever profile you want to use.
Yes, you can all bookmarks and passwords stored in your iCloud keychain from any profile.
You can delete a Safari profile at any time by going to Settings, Safari, selecting your profile and tapping Delete Profile.
It’s important to note that this will erase any favourites, history and tab groups associated with that profile and close all websites open in the profile.


